Recipe tab
Plan a brew in BrewForge: equipment and volumes, style fit, fermentables, hops, yeast, mash steps, fermentation schedule, water, scaling and the checks that catch mistakes before brew day.
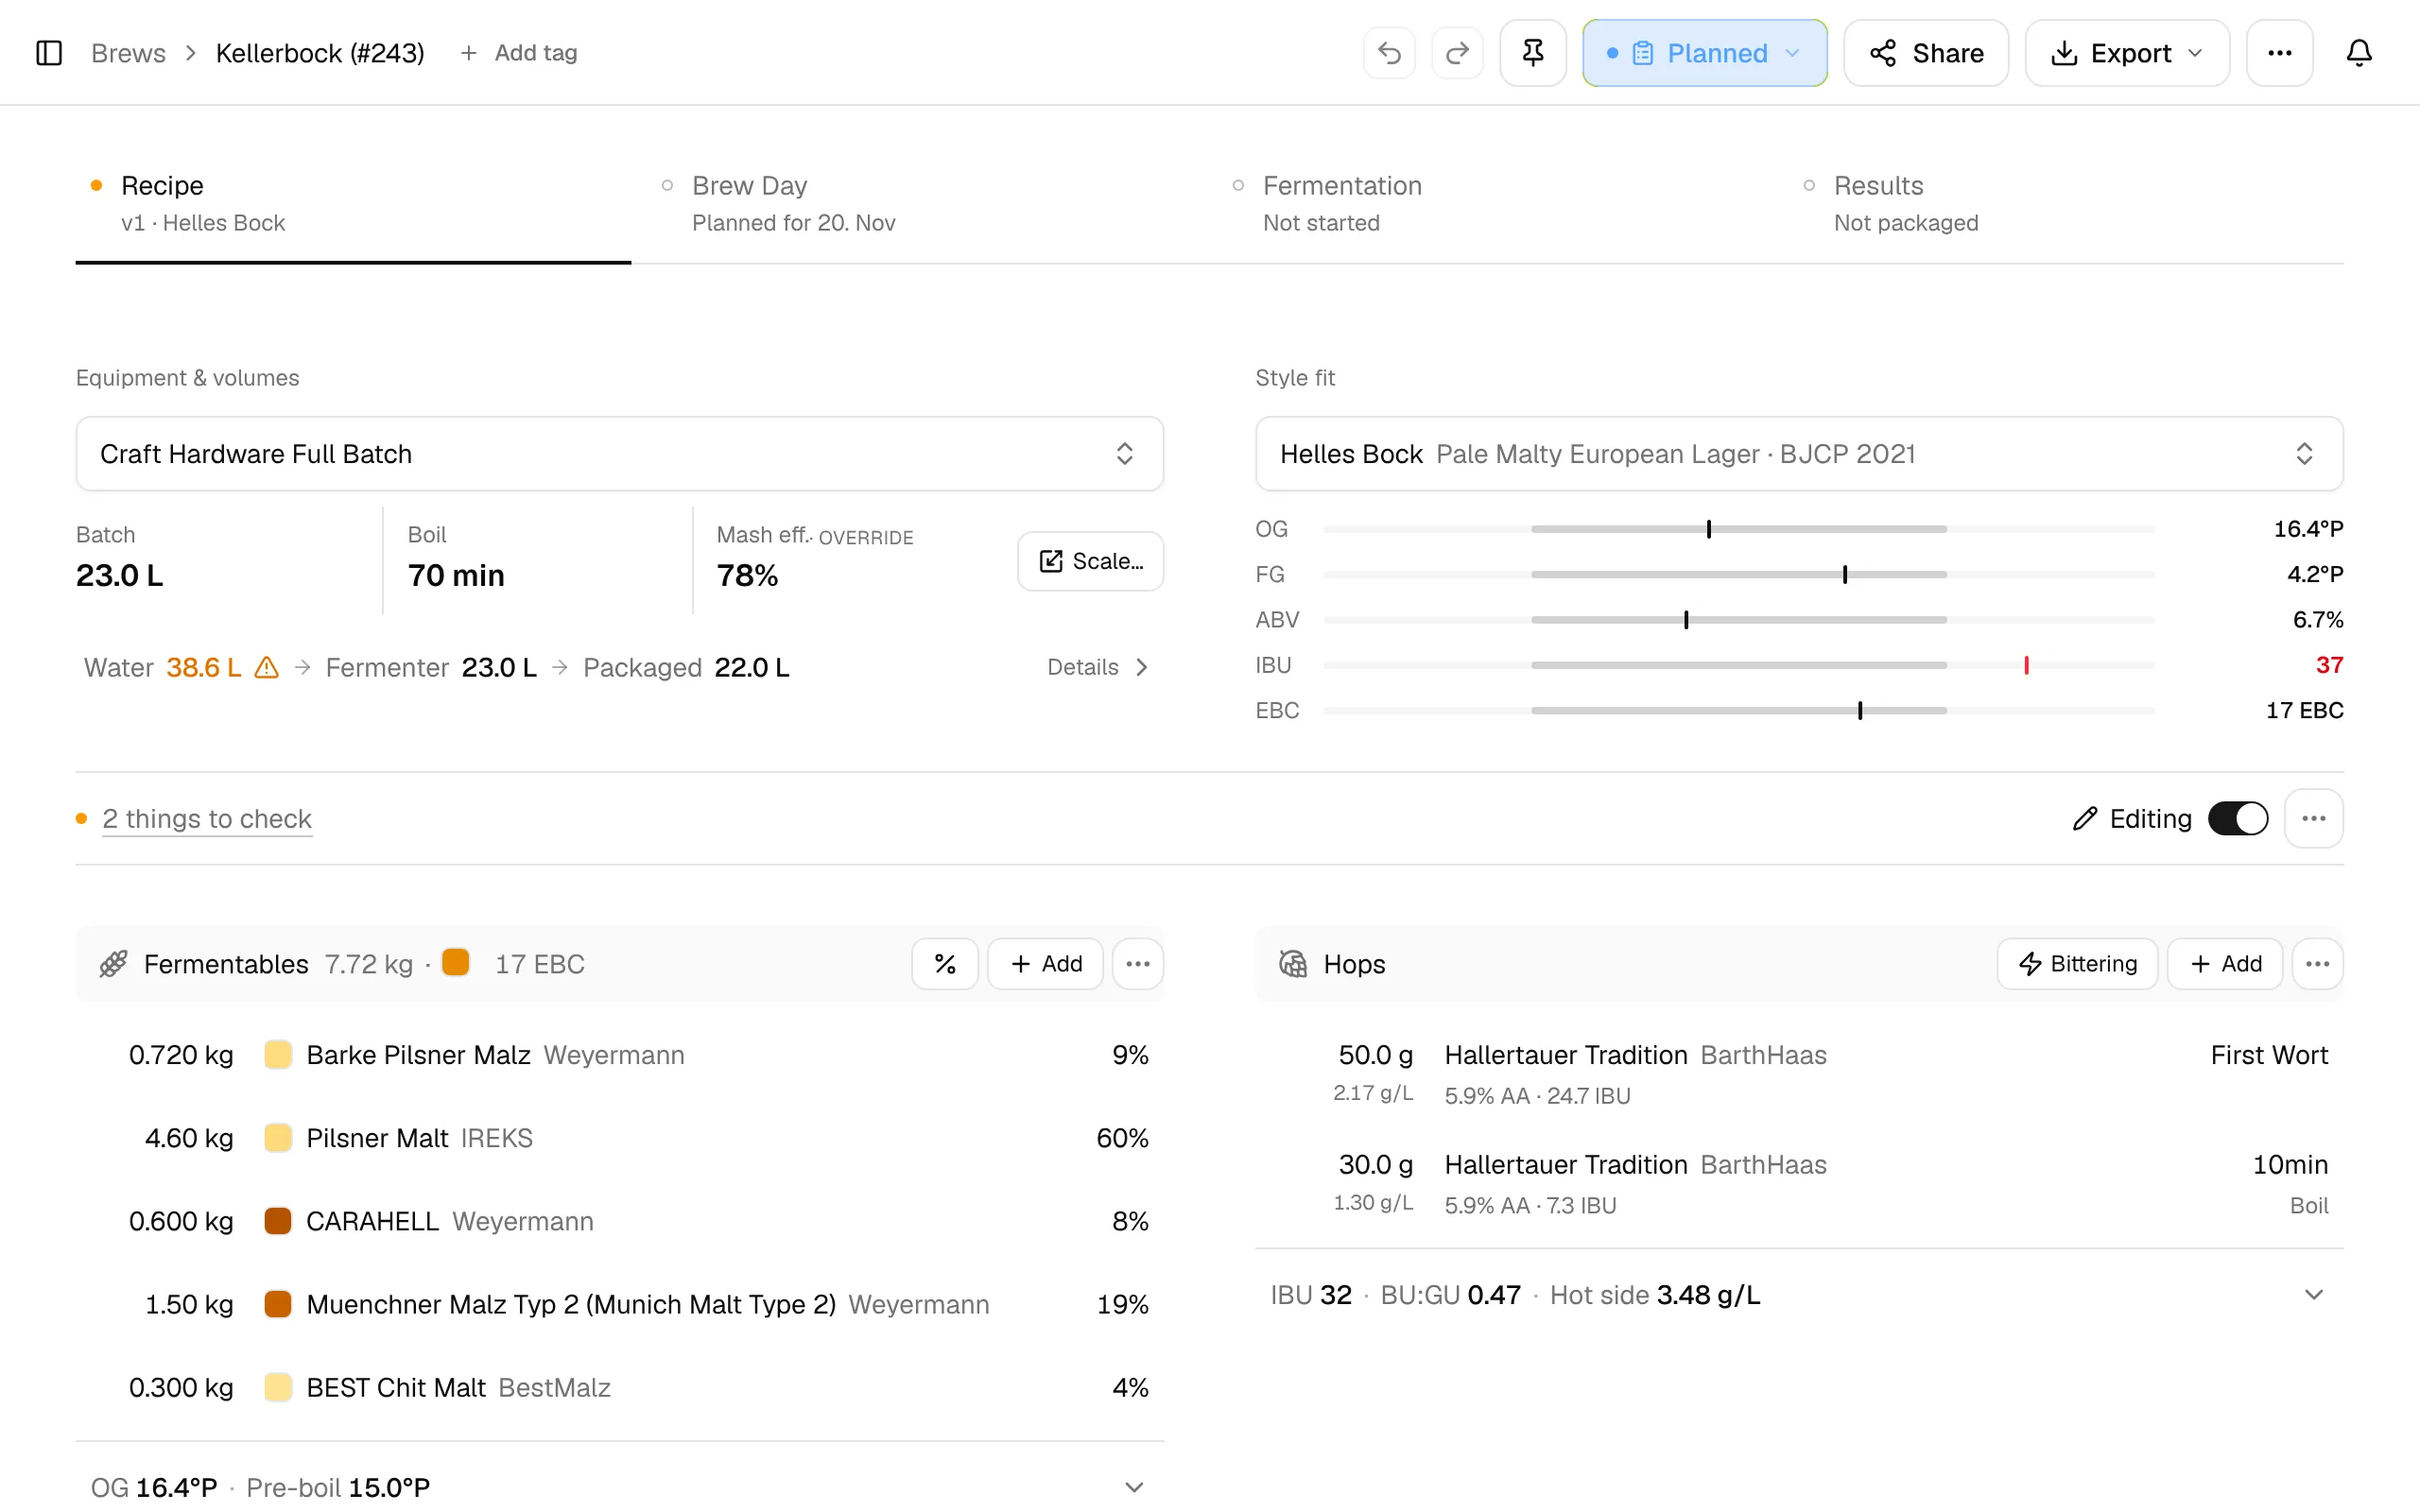
The Recipe tab is the plan for the batch. It reads like a recipe sheet: the key numbers at the top, then one section per part of the recipe. Each section shows its ingredients or steps and, in a line at the bottom, its result (OG, IBU, strike water, …). Click that line for more numbers, click a row to change it, and use a section's ⋯ menu for the less common tools.
Editing and viewing
Ideas and planned brews open ready to edit: the switch next to the ⋯ menu says Editing. Changes save automatically, and Undo and Redo in the header (or ⌘Z and ⌘⇧Z) step back and forth.
Once you have brewed, the recipe opens in Viewing, so you don't change it by accident. Every dialog still opens and shows its values. To change the recipe, flip the switch. BrewForge asks how:
- Edit This Version: changes this brew's recipe directly, for example to correct a mistake.
- Create New Version: makes a new version (v2, v3, …) to try something new, and keeps this brew as it was. See versions.
Imported recipes keep the values of the program they came from (marked with a small blue dot). To edit one, BrewForge has to recalculate it: Create New Version keeps the original import in the version history, Transform to Native Recipe converts it in place.
Notes (the recipe description) can be edited at any time, also while viewing.
Equipment and volumes
The top left shows the equipment profile the recipe uses and its three key values: Batch size, Boil time and Mash eff. (or Brewhouse eff., depending on your profile). A value you changed for this recipe is marked override. With Settings → General → Calculations → Efficiency set to German (Sudhausausbeute), the third value is SHA instead, and Recipe settings, Scale… (New Sudhausausbeute), the equipment change dialog and the fermentables footer show and take the Sudhausausbeute too; the recipe still stores mash or brewhouse efficiency. See Efficiency: international or Sudhausausbeute.
- Click the equipment to Change equipment. BrewForge shows what changes and asks how the recipe should adapt: Scale ingredients keeps OG, ABV and IBU as close as possible at the new batch size, Keep amounts keeps every amount and lets the numbers follow the new equipment. If you edited the profile after the recipe used it, it offers to Refresh from updated profile.
- Click the three values to open Recipe settings: batch volume, boil time, efficiency, water:grain ratio and fermenter top-up for this recipe only. Reset goes back to the profile's value. If you change the batch size, you choose whether to scale the ingredients; if you change the efficiency, whether to adjust the malts to keep the OG.
- Scale… scales the whole recipe to a new batch size or a new efficiency, with a preview of every amount before and after. Scaling to an efficiency only changes the mashed fermentables.
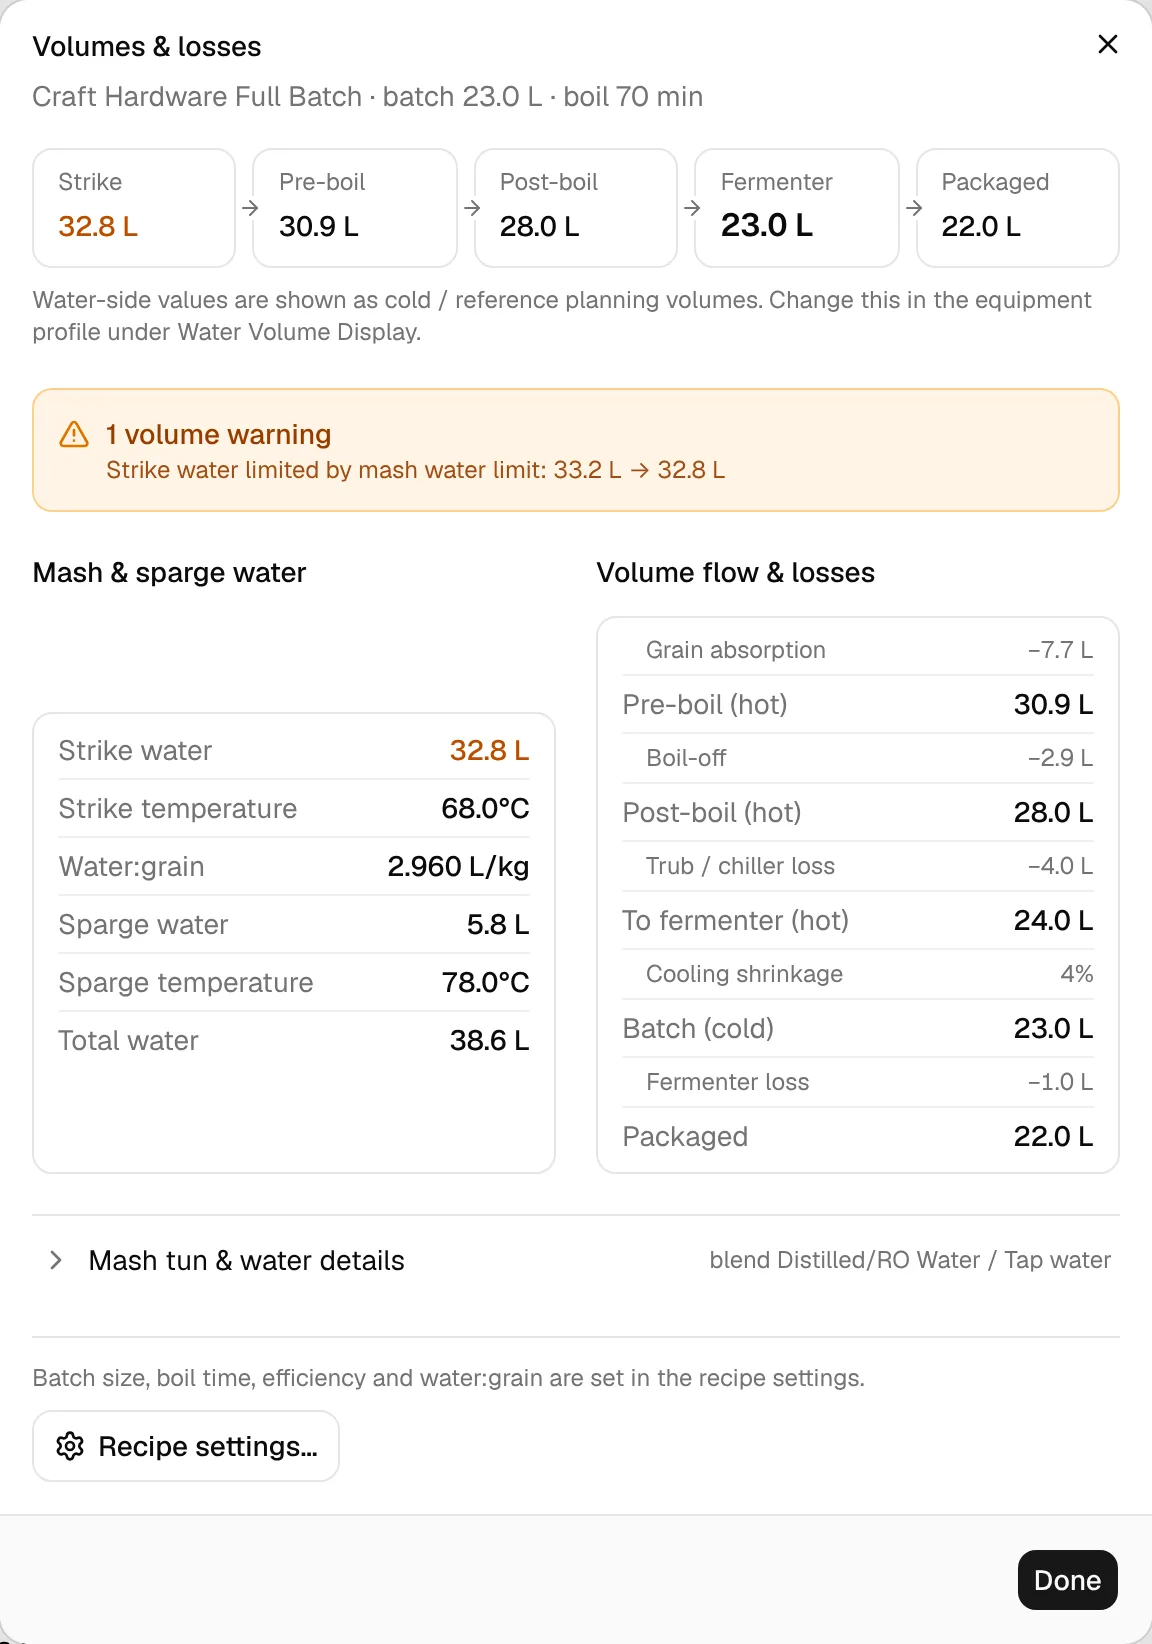
Below, the volume line shows Water → Fermenter → Packaged. A value in amber or red has a problem (for example, the mash tun or kettle overflows). Details opens Volumes & losses: every step from strike water to the packaged beer, with the losses in between.
Style fit
The top right compares the recipe with its style. Click the style to open Beer style: the style library and your own styles, and Best fits for this recipe, the styles whose ranges fit the recipe best.
Five bars show OG, FG, ABV, IBU and color, the same values as the sections below. The style's range is the grey middle part, the tick is your recipe. The value turns amber when it is just outside the range (within 10 % of its width) and red when it is further out.
Things to check
Below the top area, BrewForge lists anything that needs a look, for example "IBU is above the style range", "Mash tun overflow" or "Grist adds up to 95 %, not 100 %". Click the line for the list; each entry takes you to the section or dialog that fixes it. When all is well it says Nothing to check.
Fermentables
Each row shows the amount, color, name, supplier and share of the grist. The bottom line shows OG and Pre-boil gravity; expand it for a grist bar, color, grain weight and both efficiencies.
- Add opens the ingredient picker. In stock shows what is in your inventory, All every ingredient in your picker. After picking, enter the amount and when it goes in: Mash, Lauter, Boil or Ferm. (fermentation). The dialog shows how much you need and how much is in stock.
- Click a row to change the amount or timing, swap the ingredient with Change ingredient… (amount and timing stay) or Remove it.
- All ingredient dialogs in detail (picker, fields, specs, stock, linking imported ingredients): Ingredient dialogs.
- % (Grist targets) switches to entering malts as a share of the grist: set a target OG and the percentage per malt, and BrewForge works out the weights at your efficiency and batch size.
Hops
Rows show the amount (and grams per litre), name, alpha acid, IBU of the addition, and the time and use: Mash Hop, First Wort, Boil, Whirlpool or Dry Hop. The bottom line shows IBU, BU:GU and Hot side hops in g/L; expand it for the IBU of each addition and the dry hop rate.
- Add a hop with its use. Boil hops take the minutes before flameout, whirlpool hops an optional temperature and time, dry hops the day after fermentation start and an optional contact time (which creates a reminder to remove them).
- Bittering (Quick bittering) works out the grams of a bittering hop for a target IBU. You can remember the hop as your default.
- ⋯ → Bitterness targets switches to entering bittering hops by target IBU: each boil, first wort and whirlpool addition gets a share, the grams follow. Mash and dry hops keep their grams.
- ⋯ → IBU breakdown lists the IBU per addition and compares the total with the style.
- ⋯ → Hopstand sets the temperature and duration of the hopstand after flameout for this recipe, or a hopstand curve for a cooling wort. The defaults come from the equipment profile. The hopstand adds IBU to whirlpool additions and to every boil and first wort addition, which keep isomerizing while the wort is hot.
Yeast
Rows show the amount, yeast and lab. The bottom line shows the expected Atten., FG and ABV.
- Calculator opens the yeast pitch rate calculator with this brew's volume and OG.
- ⋯ → Final gravity shows how the FG is calculated and lets you Set manually an FG, for example from experience with this recipe. A manual FG is used for ABV and the style fit and is marked FG (manual).
The calculated FG starts from the yeast's attenuation and adjusts it for your mash: a cooler saccharification rest makes the wort more fermentable, a hotter one less. See Brew calculations.
Other
Water salts, finings, spices and anything else. Each row shows the amount, the time and the use. Amounts can be entered per litre, so they follow the batch size.
Mash
The mash section shows the mash profile and its steps with temperature and time. edited after the profile name means the steps differ from the profile.
- Click the profile name (or ⋯ → Load mash profile) to load another profile. BrewForge shows the current and new steps side by side before replacing them.
- Step adds a step, a click on a step changes it. Drag the handle to reorder.
- Step types: Temperature (heat to the target), Infusion (add hot water) and Decoction (pull, boil and return part of the mash). For infusions and decoctions BrewForge calculates the water or the decoction volume; Override sets your own value. Every field and formula of the step dialog is explained under Mash steps.
The bottom line shows the Strike water with its temperature and the estimated mash pH (amber outside 5.2–5.6). Expand it for a temperature chart, grain, strike and sparge temperature, and the water:grain ratio.
Fermentation
The fermentation schedule: stages such as primary, diacetyl rest, cold crash and conditioning, each with temperature, duration and ramp time. Load a fermentation profile or add stages by hand, like in the mash section.
- A primary or secondary stage can be a Spunding stage: enter the pressure and BrewForge tells you during fermentation when to close the valve (see spunding).
- ⋯ → Carbonation & conditioning sets the Target CO₂ (with the style's range) and the total conditioning days.
The bottom line shows the total days, the target CO₂ and the conditioning time. The schedule drives the reminders on the timeline, the calendar and the fermentation chart.
Cellar
With the cellar (Pro plan) and at least one vessel, the fermentation section ends with the brew's cellar plan. Plan in cellar picks a fermenter or tank for each step and reserves it for those days; Open cellar shows the whole cellar. If you brewed on a different day than planned, BrewForge offers to move the plan.
Water
The water section shows your source water, the salts and acid you add, the resulting ions and the estimated mash pH. Adjust opens the water calculator. See Water.
Notes
Notes holds the recipe description: background, ideas, what to watch out for. Click Edit to change it. Notes about this batch go into the timeline instead.
If you defined custom fields with the placement Brew Details, they appear below the recipe.
Print the recipe
Export → Recipe sheet prints the recipe: ingredients, water, mash and fermentation with a temperature chart each, and the planned volumes and gravities. See PDF exports.