PDF exports
Print a brew from BrewForge: a recipe sheet with mash and fermentation charts, a brew day sheet with targets and fields for actual values, and a fermentation log with rows for your readings.
Every brew can be printed as three PDF sheets. Each one is made for a moment: the recipe sheet to read or share the plan, the brew day sheet to have next to the kettle, and the fermentation log to hang on the fermenter. All three are black on white with thin lines and no coloured areas, so they print well on any printer and you can write on them.
Export a PDF
Open the brew and click Export in the header. On smaller screens, Export is in the ⋯ menu.
Under PDF, pick Recipe sheet, Brew day sheet or Fermentation log. Each row says what the sheet is for.
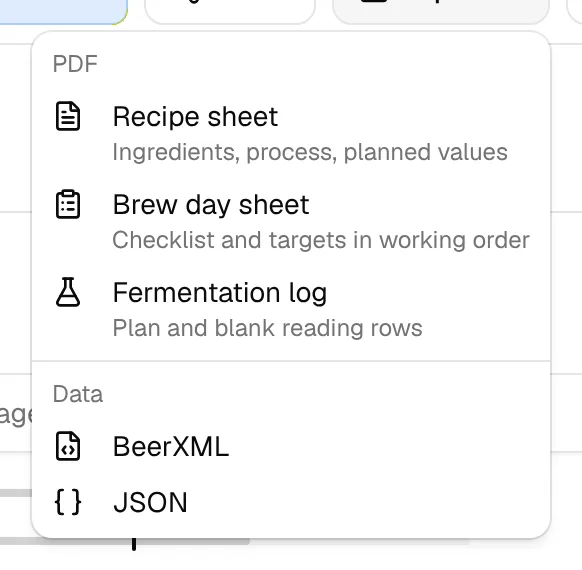
While the sheet is being made, its row shows Preparing… and the menu stays open. Then the browser downloads the file, named after the brew, for example Winter_Festbier_2026_brewday_sheet.pdf.
If a sheet can't be made, a message says so and offers Retry. You don't get a broken file.
The export works for every brew, whatever its status, and also for brews that are read-only on the Free plan. Under Data in the same menu are BeerXML and JSON; see Share, export and versions.
What every sheet has
- Header: brew name, style, batch number, date, brewer and brew type (all grain, partial mash, extract), the BrewForge logo and the name of the sheet.
- Footer on every page: brew name, batch number and sheet name on the left, the date you exported it and Page x of y on the right. The fermentation log also prints the brew's short ID there, so you can match a sheet to the brew.
- Your units and language: the sheets use the units and date format from Settings → General → Units & formats (weight, volume, temperature, gravity in SG or °P, color in SRM or EBC) and are written in your app language. See Settings.
- Paper size: A4, or US Letter when your volume unit is gallons.
- Rows are never split across two pages. Each sheet fits one page for a typical recipe; long recipes continue on a second page.
The brewer in the header is the brewer saved on the brew, otherwise your brewery Name from Settings → General → Brewery. The brew day sheet uses only the brewer saved on the brew and otherwise leaves a line to write a name on.
Recipe sheet
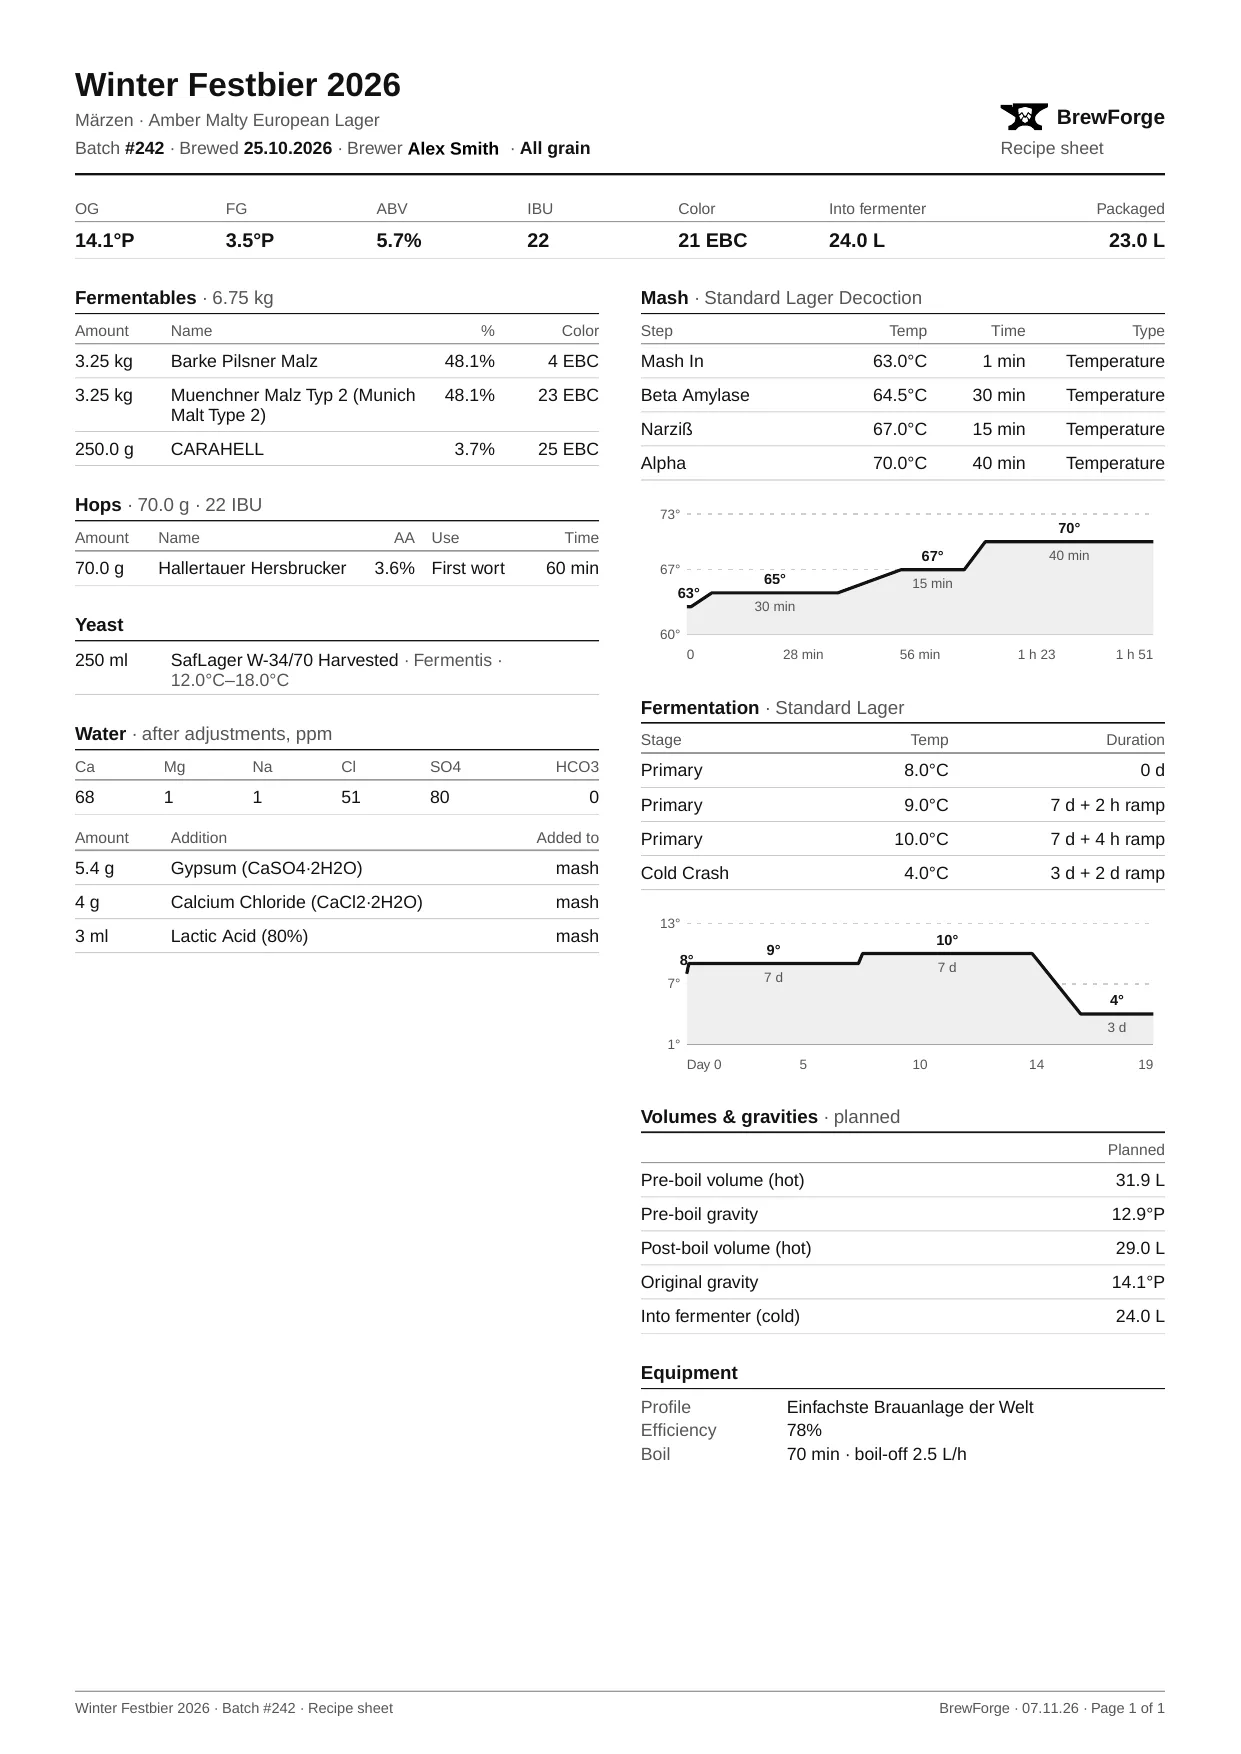
The recipe sheet prints the plan only, never measured values, so you can hand it to someone who wants to brew the recipe. It has:
- A row of planned stats: OG, FG, ABV, IBU, Color, Into fermenter and Packaged volume.
- Fermentables with amount, share in %, and color; Hops with amount, alpha acid, use and time (dry hops in days); Yeast with lab, temperature range and attenuation; Other additions with amount and use.
- Water: the target water profile after adjustments (Ca, Mg, Na, Cl, SO4, HCO3 in ppm) and the water salts and acids with the amount and where they go (mash, sparge or both). Shown when the recipe has a water profile or additions.
- Mash: the steps with temperature, time and type, sparge water temperature, and a chart of the temperature over time.
- Fermentation: the stages with temperature and duration (plus ramp time), and a chart of the temperature over the days.
- Volumes & gravities (planned): pre-boil volume and gravity, post-boil volume, original gravity and the volume into the fermenter. When you top up in the fermenter, also the OG and volume before topping up.
- Equipment: profile name, efficiency, boil time and boil-off.
- Notes (the brew description) and Tasting notes with your rating, when the brew has them.
The values come from the same calculations as the Recipe tab; see Calculations.
Brew day sheet
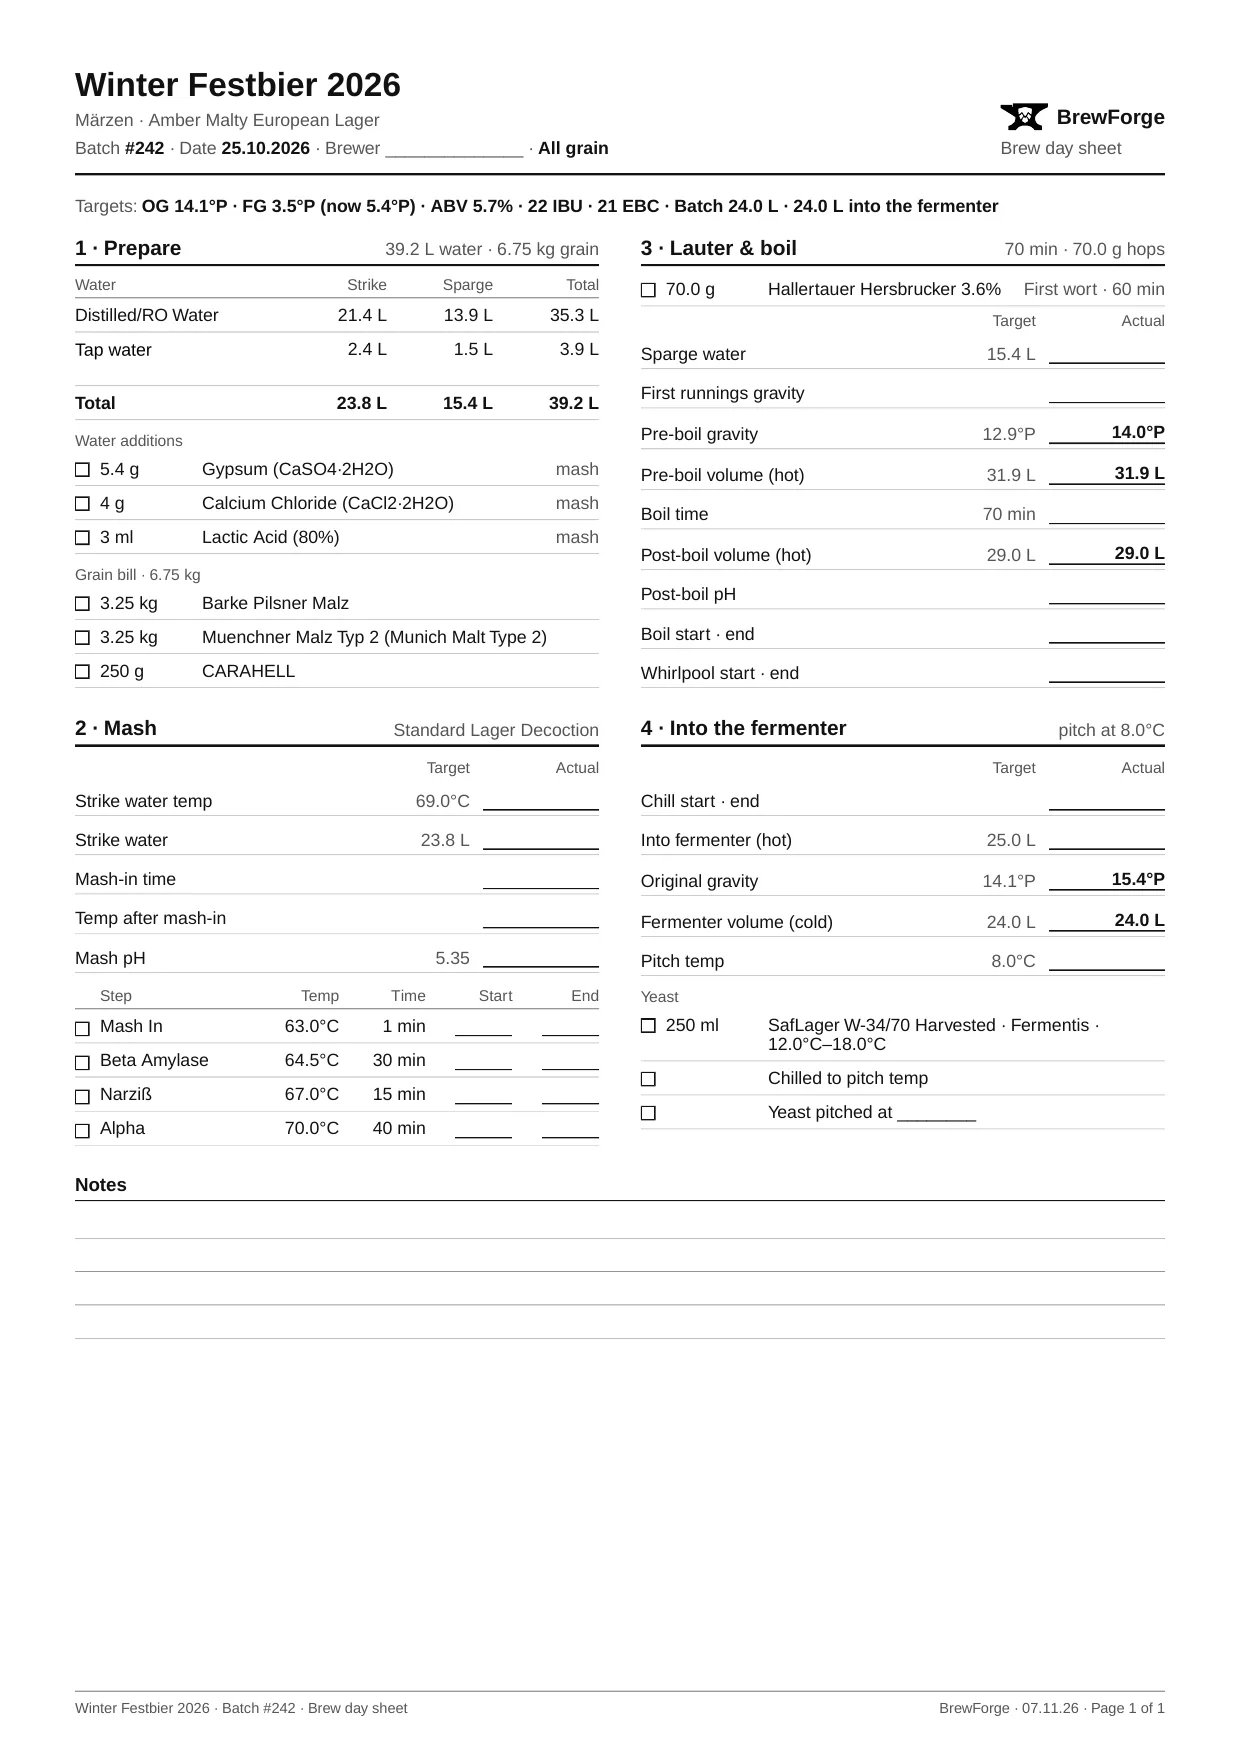
The brew day sheet follows your brew day in working order, in four numbered phases. Every ingredient has a box to tick where you add it, and every measurement has the Target next to a line for the Actual value. A line under the header lists the Targets: OG, FG, ABV, IBU, color, batch size and the volume into the fermenter.
- Prepare: water volumes split into strike and sparge (per water when you blend two waters), water additions, and the grain bill with its total weight.
- Mash: strike water temperature and volume, mash-in time, temperature after mash-in, mash pH, mash hops and additions, then the mash steps with fields for start and end time, and the sparge water temperature.
- Lauter & boil: kettle hops and boil additions (first wort, boil, whirlpool), then sparge water, first runnings gravity, pre-boil gravity and volume, boil time, post-boil volume and pH, and fields for boil and whirlpool start and end.
- Into the fermenter: chill start and end, top-up water (only when you top up), the volume into the fermenter, original gravity, fermenter volume and pitch temperature, the yeast, Chilled to pitch temp and Yeast pitched at ________ to tick off, and dry hops and fermenter additions.
At the bottom are lines for Notes.
The measurements are the same as on the Brew Day tab. Values you already entered in the app are printed in bold in the Actual column, so you can print the sheet again halfway through the day. When the brew has a measured FG, the targets line shows it as "now".
Fermentation log
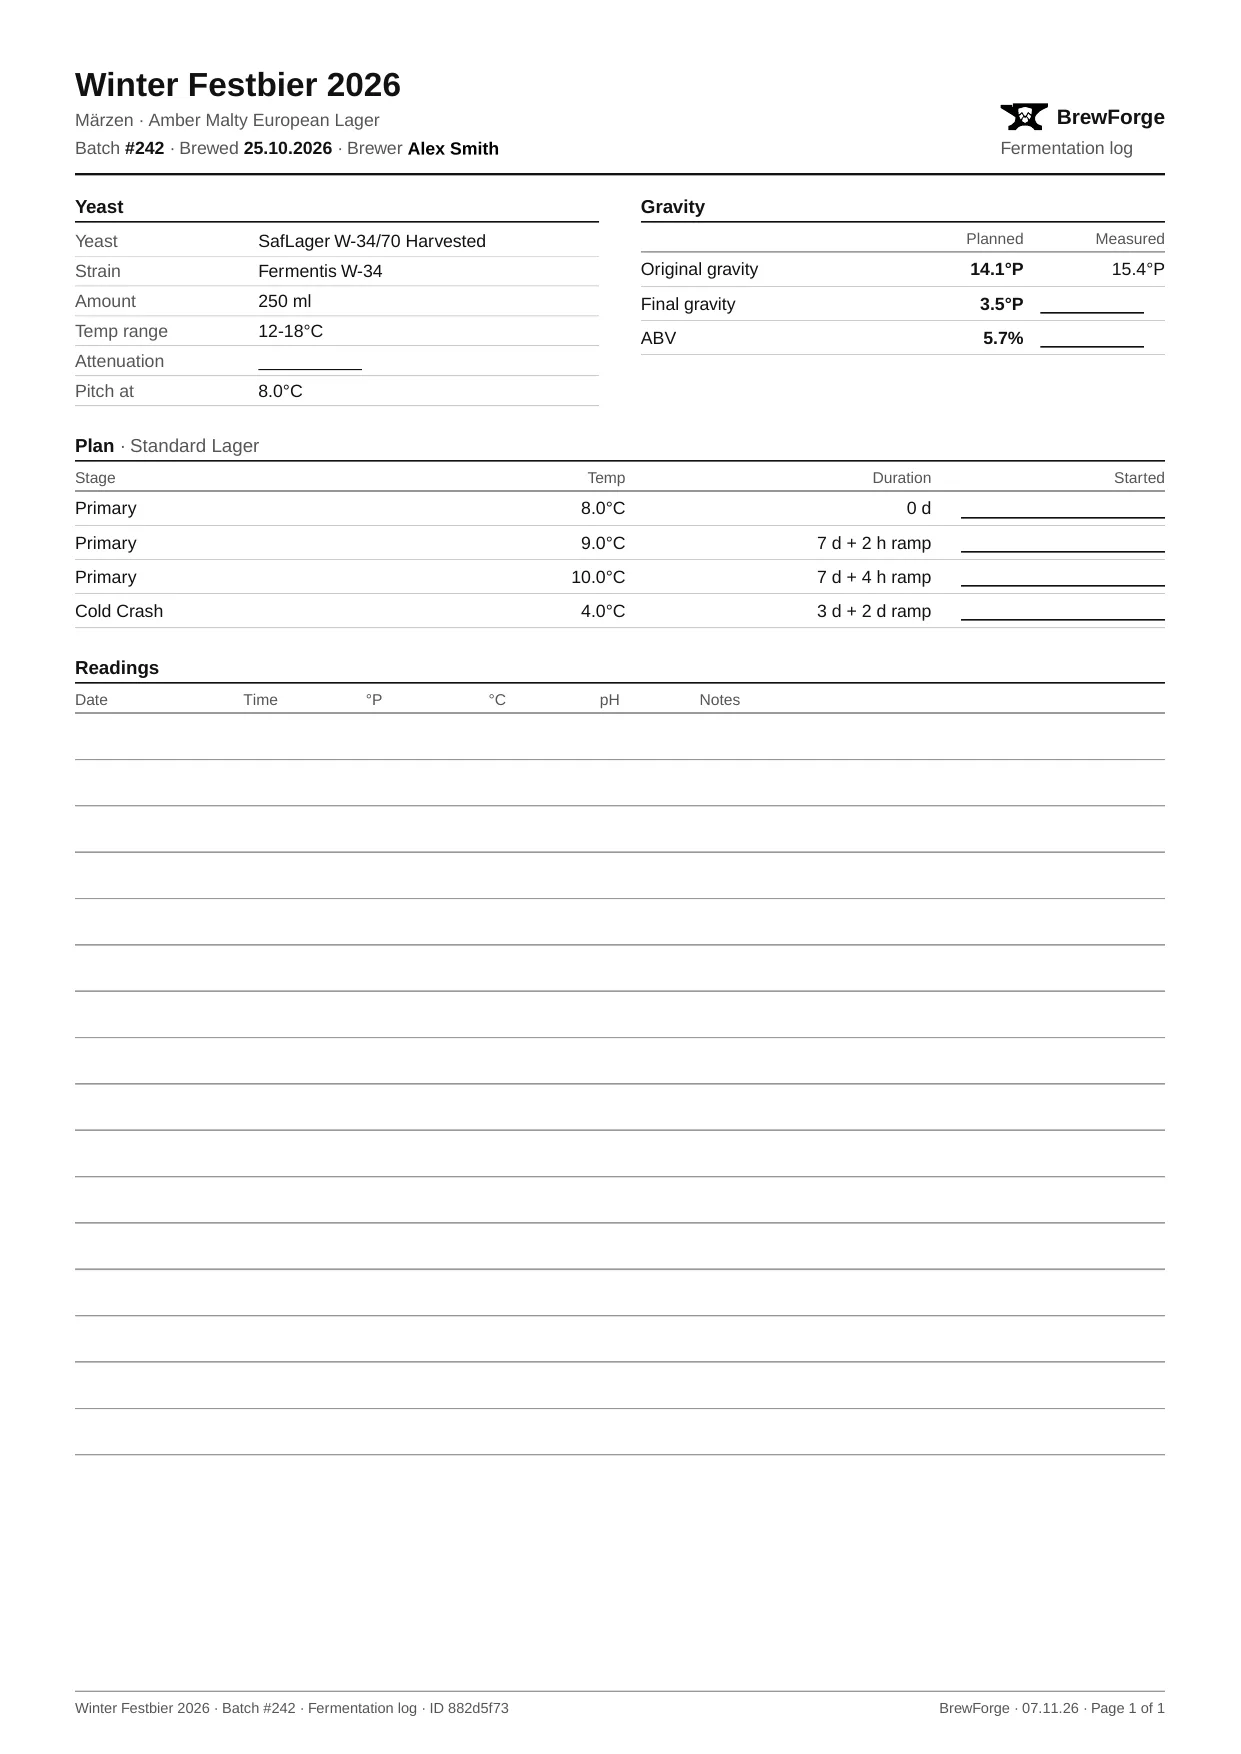
The fermentation log is a sheet for the fermenter, for readings you take by hand:
- Yeast: name, strain, amount, temperature range, attenuation and the pitch temperature.
- Gravity: original gravity, final gravity and ABV, Planned next to Measured. Measured values from the app are printed in; the others are lines to fill in. The measured ABV appears once a final gravity is measured.
- Plan: the fermentation stages with temperature and duration, and a Started field for the date each stage began.
- Dry hops with amount and timing, to tick off (only when the recipe has dry hops).
- Readings: 16 empty rows with columns for date, time, gravity (in your gravity unit), temperature, pH and notes.
To log readings in the app instead, see Fermentation.
Other PDFs
- Tap list menus can be downloaded as a PDF in A4 or Letter. See Menus and screens.
- Labels are printed on a label printer, not exported as PDF. See Labels.