Import from Brewfather
Move from Brewfather to BrewForge: export a Brewfather backup and import your brews, recipes, fermentation readings, ingredients, equipment and profiles in a five-step wizard.
Switching from Brewfather doesn't mean starting over. BrewForge reads your Brewfather backup and brings over your brews with their fermentation readings and notes, your recipes, the ingredients they use, your stock, and your equipment, mash, fermentation and water profiles. A five-step wizard lets you choose what comes over. Nothing is changed in Brewfather, and nothing is saved in BrewForge until you click import in the last step.
Brewfather migration discount
If you still have time left on a Brewfather subscription purchased after March 31, 2025, BrewForge gives you a discount proportional to your remaining days. Open Subscription from the menu at the bottom of the sidebar, choose the Brewfather migration offer and upload your Brewfather receipt from Paddle. The discount stacks with other promotions.
Before you start
- A BrewForge account: sign up if you haven't yet.
- Room on your plan: the Free plan holds up to 20 brews. Every imported brew counts, and so does every imported recipe. The wizard shows how much room you have left (see Free plan limit).
- Your Brewfather backup (step 1 below).
Step 1: Export a backup from Brewfather
- Open Brewfather and go to Settings.
- Scroll down to the Data section.
- Next to Export backup, click Export.
- Brewfather shows a warning: "This creates a complete server-side backup of the personal profile, including brewery data, settings and feature data." Click YES.
- Save the downloaded file. It is a
.zipfile named likeBrewfather_COMPLETE_BACKUP_20261026.zip. You don't need to unzip it.
The backup contains your batches, recipes, profiles and inventory, and the fermentation readings your devices logged.
The JSON file from Brewfather's older Export user data to JSON works too. A single recipe exported as BeerXML goes through the BeerXML import instead.
Step 2: Open the import
You find the Brewfather import in three places:
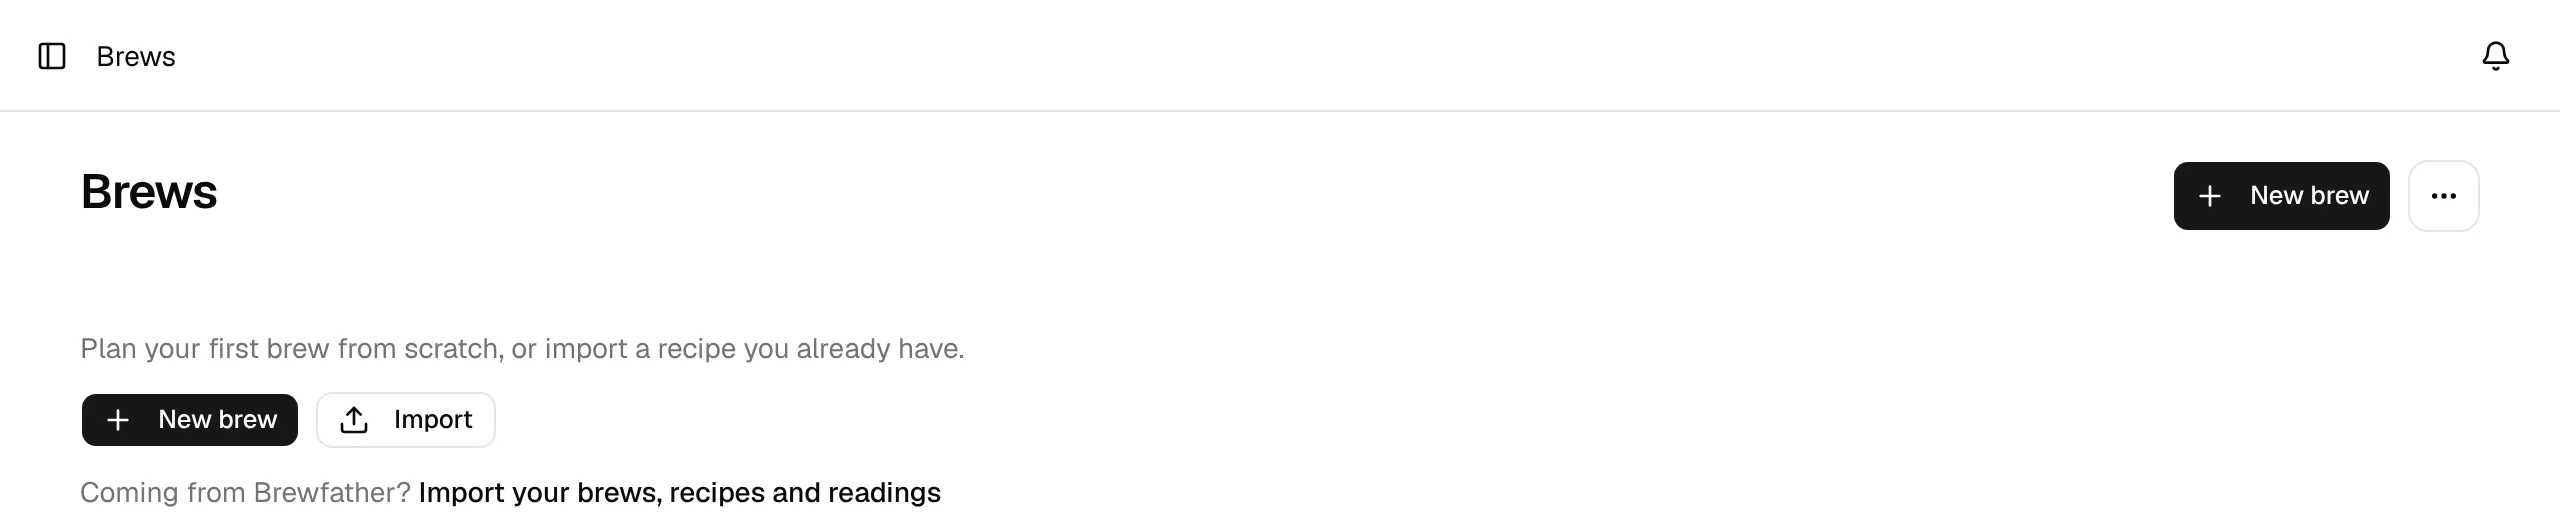
- On the Brews page while you don't have any brews yet: Coming from Brewfather? Import your brews, recipes and readings.
- In the account menu at the bottom of the sidebar (your name): Brewfather import.
- In Settings → Integrations: Import from Brewfather.
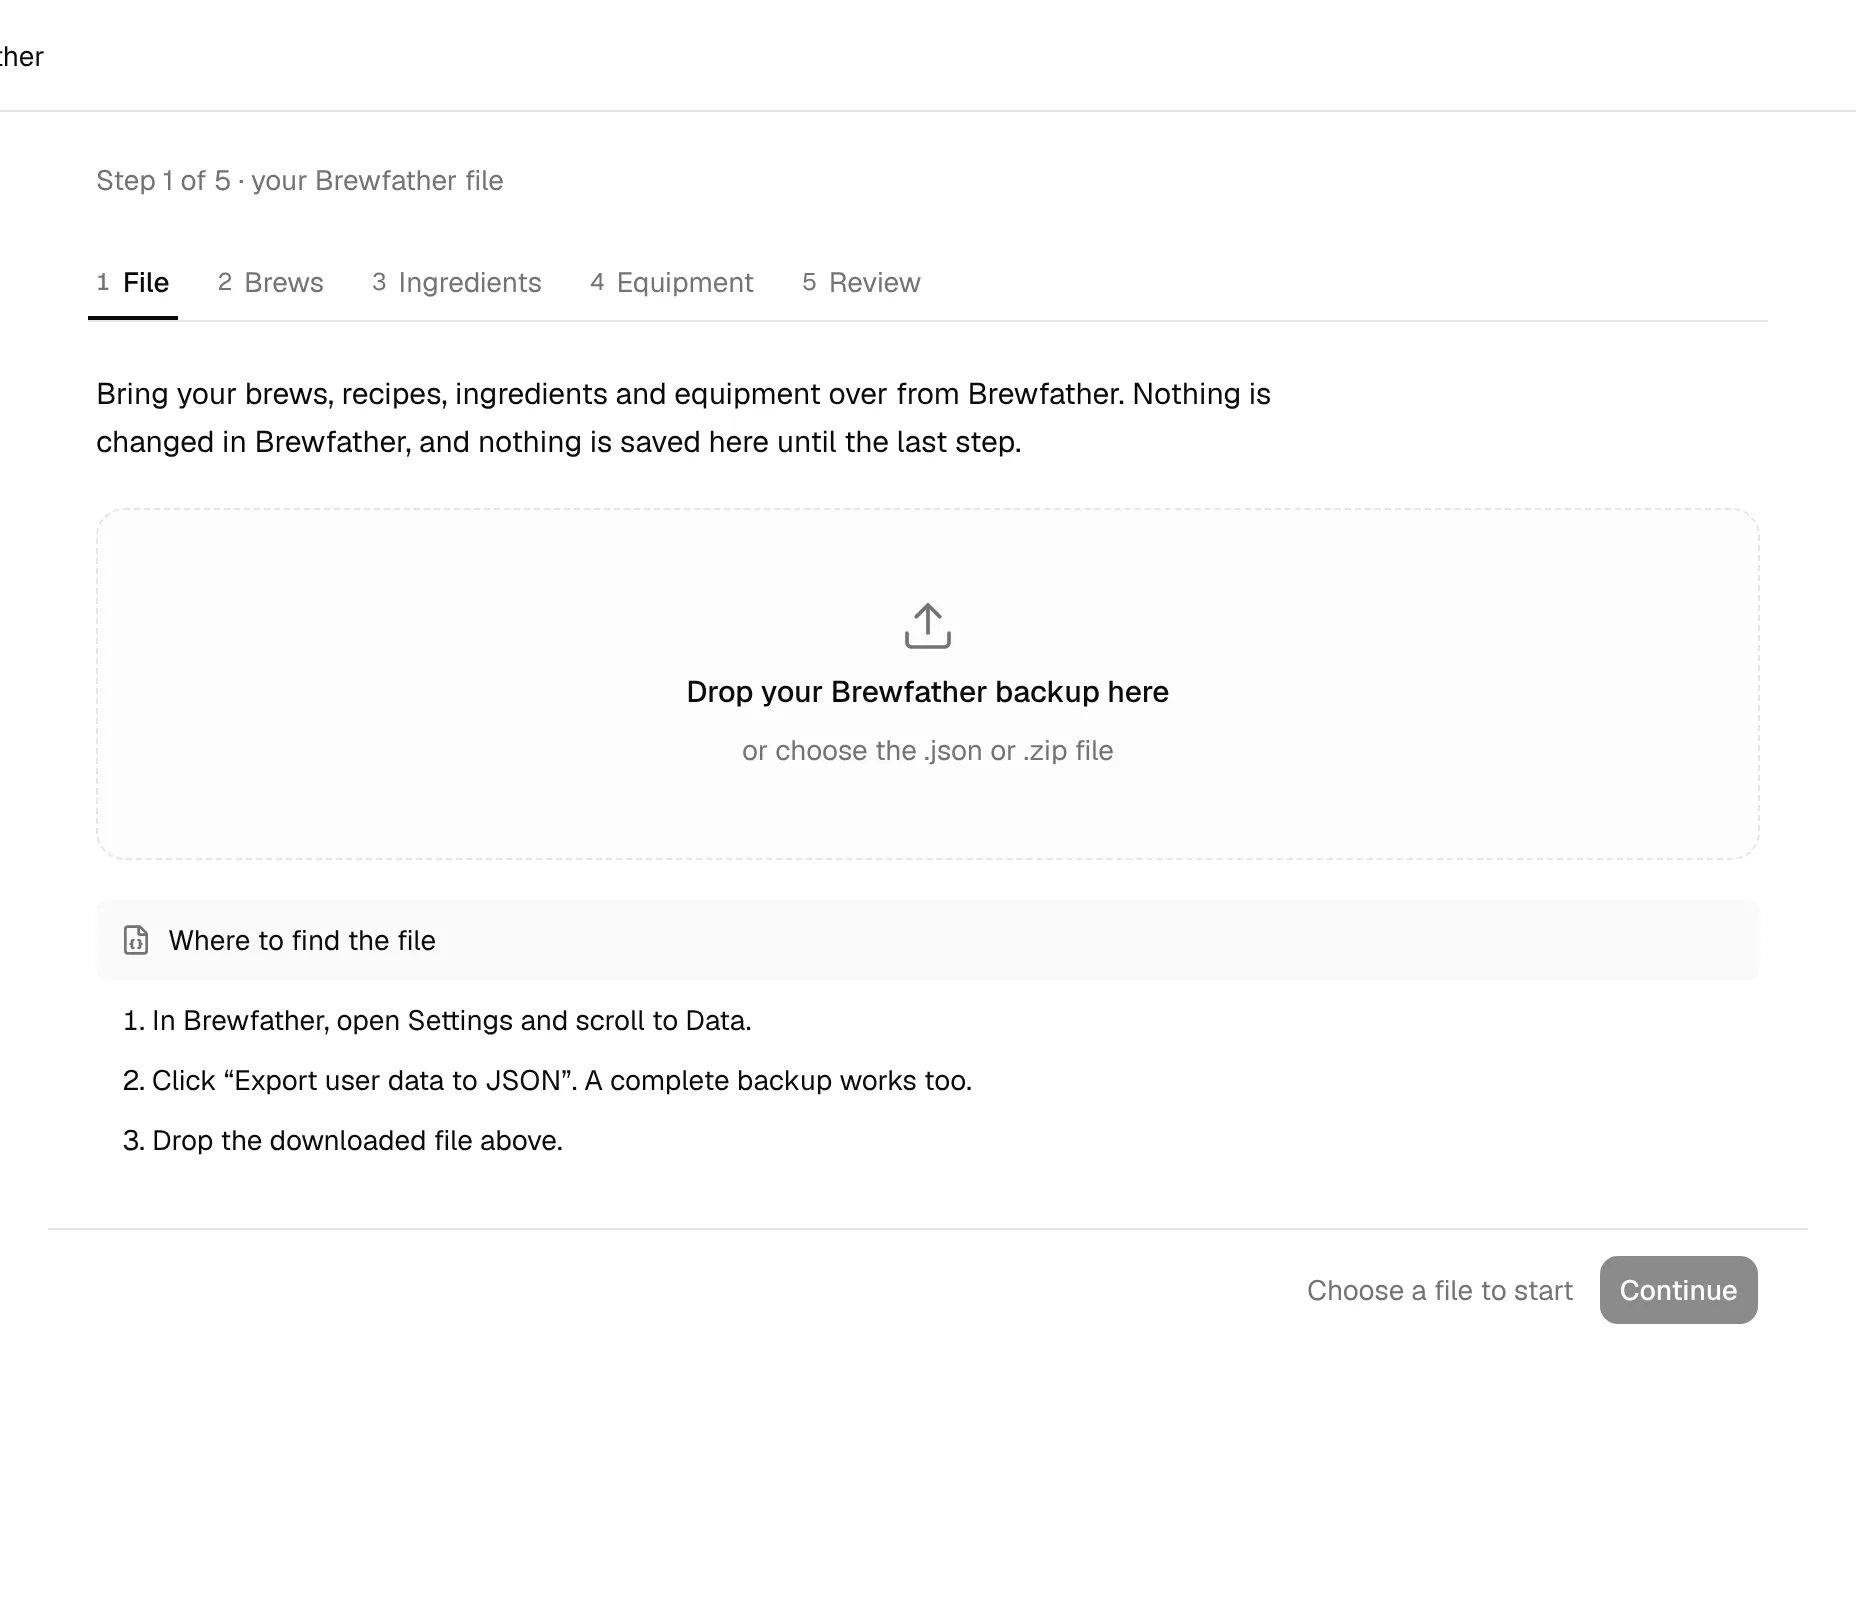
The wizard has five steps: File, Brews, Ingredients, Equipment and Review. The step bar at the top shows where you are. Once a file is loaded you can click any step to go back to it, and Back and Continue at the bottom of the page move one step at a time.
Step 3: Choose the file (File)
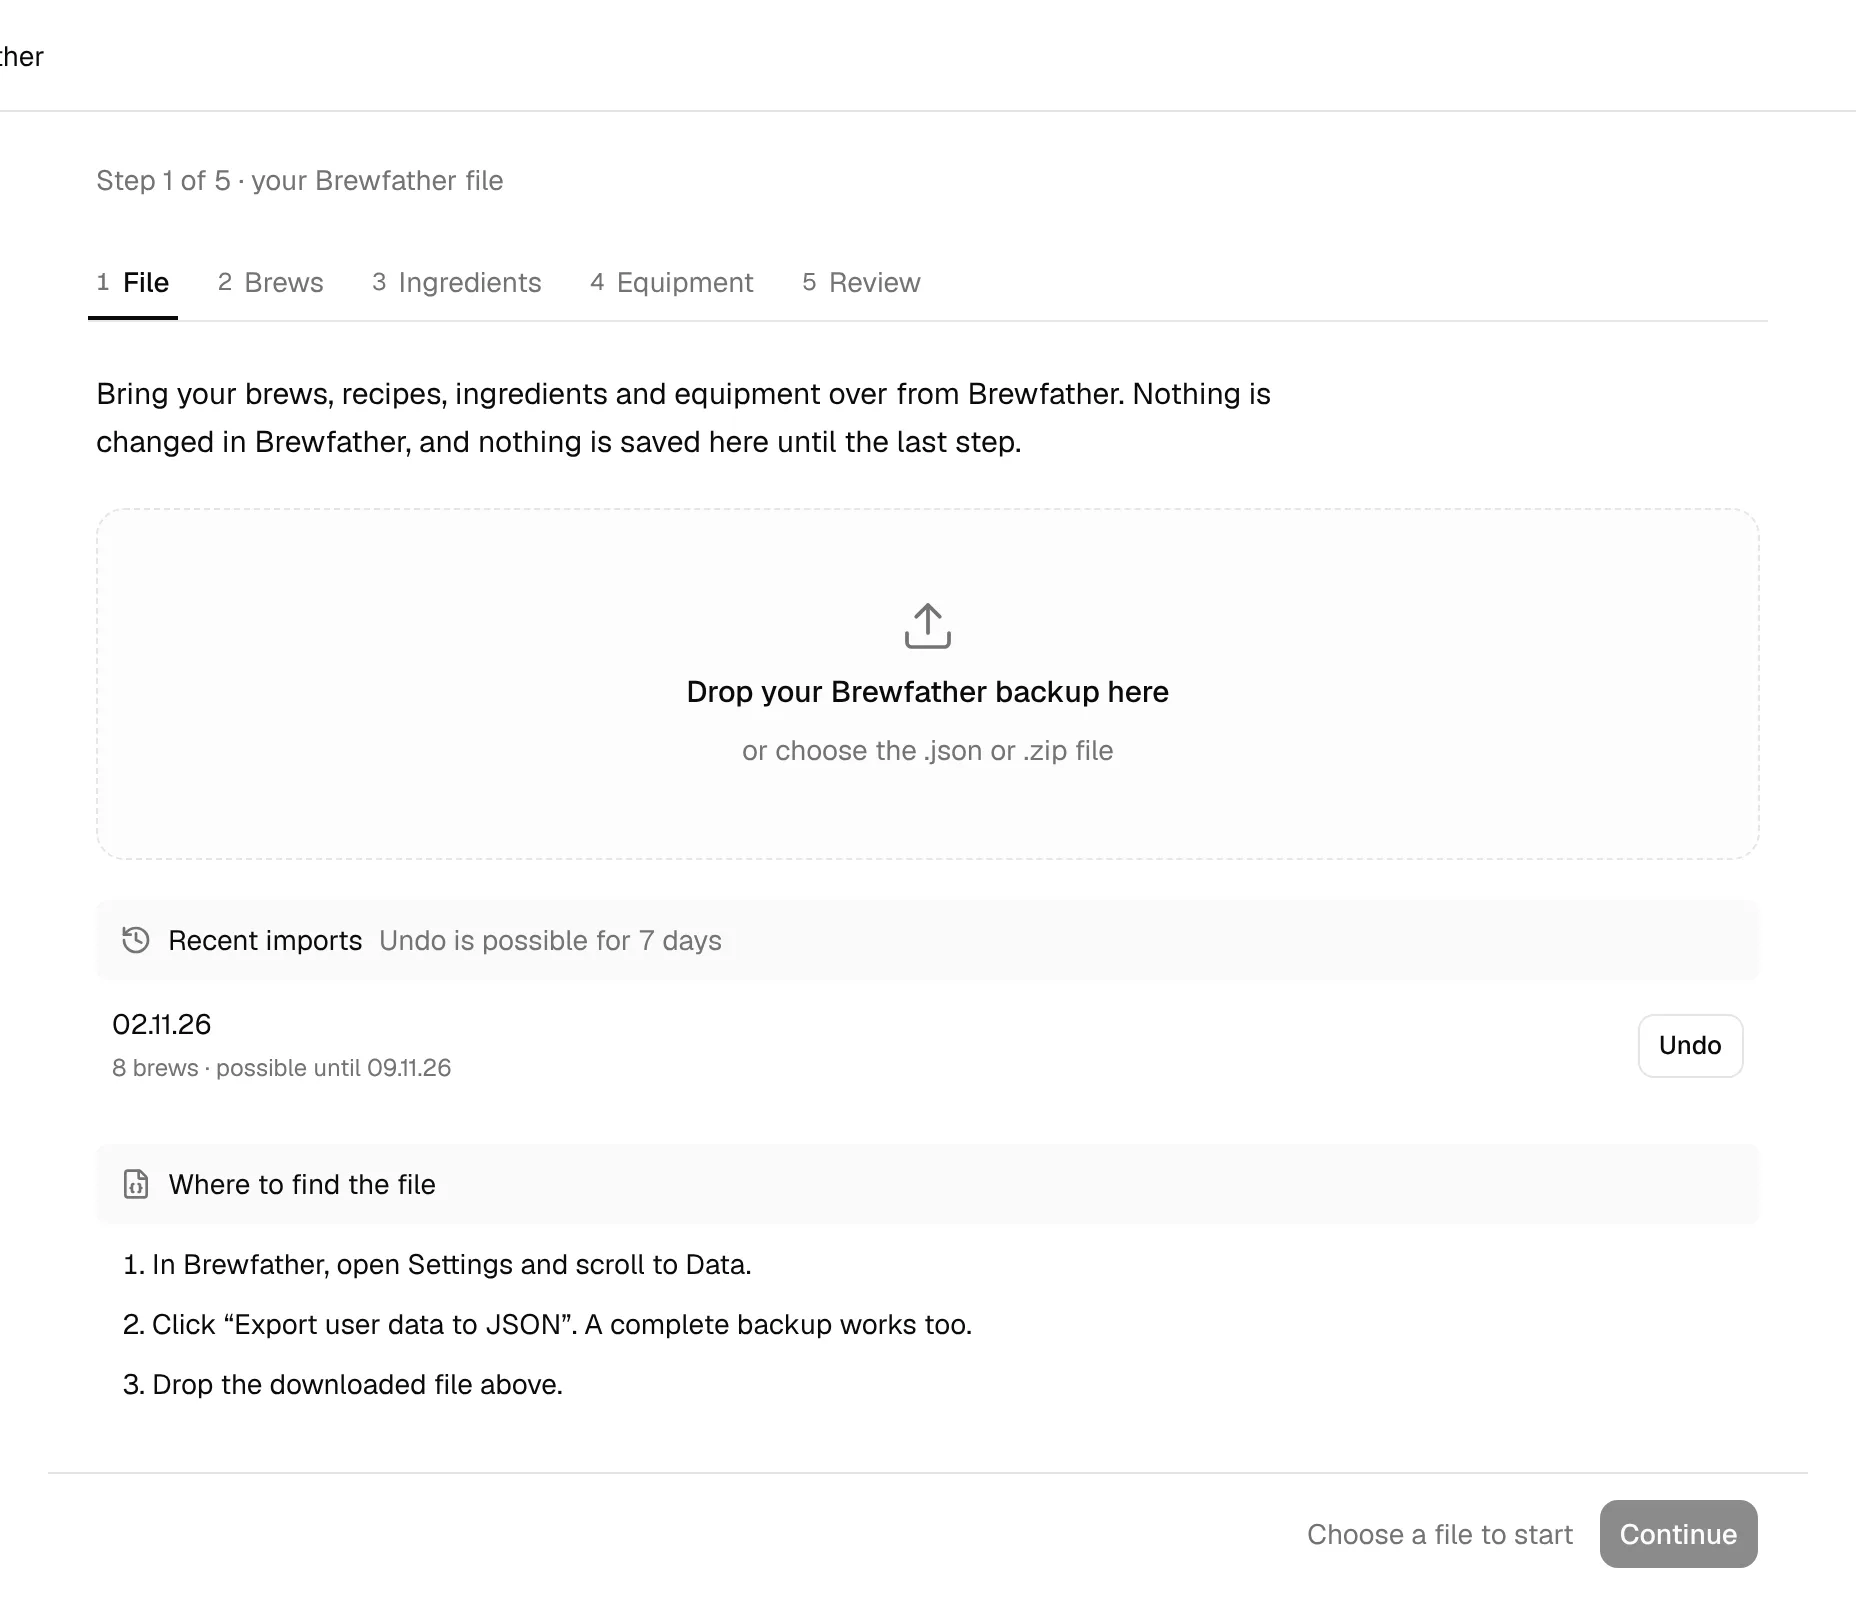
Drag the backup onto Drop your Brewfather backup here, or click it and choose the .zip or .json file. Where to find the file below repeats the export steps from Brewfather.
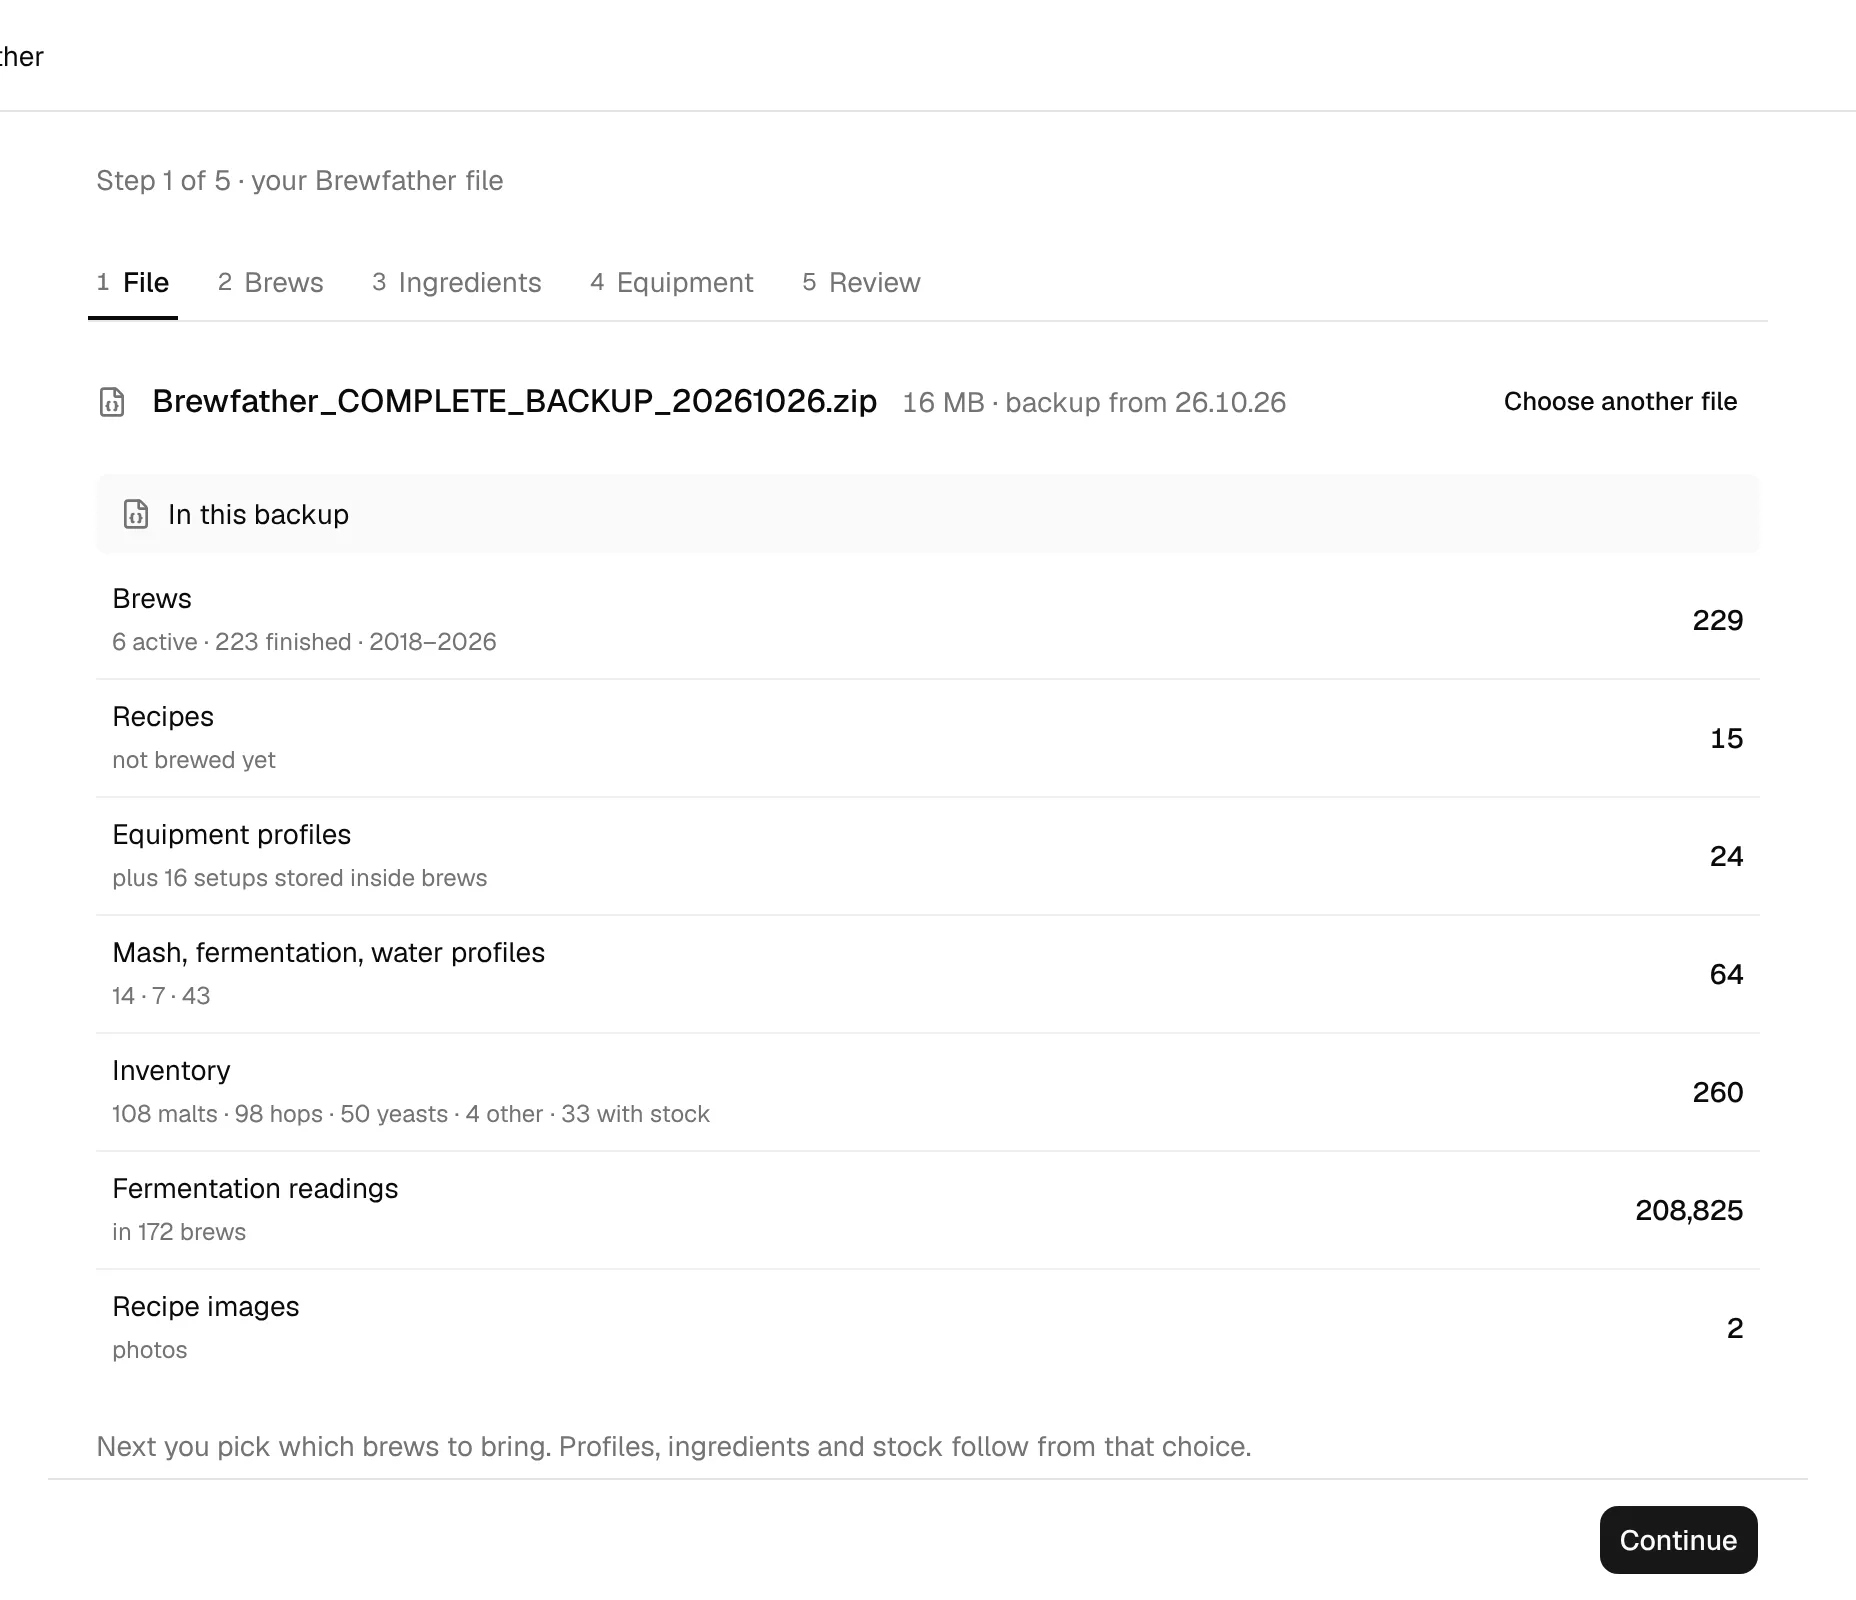
BrewForge reads the file in your browser. A large backup takes a few seconds. Then In this backup lists what the file contains:
- Brews: how many are active and finished, and which years they cover.
- Recipes: saved recipes you haven't brewed yet.
- Equipment profiles: saved profiles, plus setups that only exist inside brews.
- Mash, fermentation, water profiles, Inventory (with how many items have stock) and Fermentation readings.
- Recipe images, if your recipes have photos (they don't come over, see Review).
Choose another file starts over with a different file. Click Continue.
Step 4: Pick brews and recipes (Brews)
This step decides what comes over. Profiles, ingredients and stock in the next steps follow from your choice.
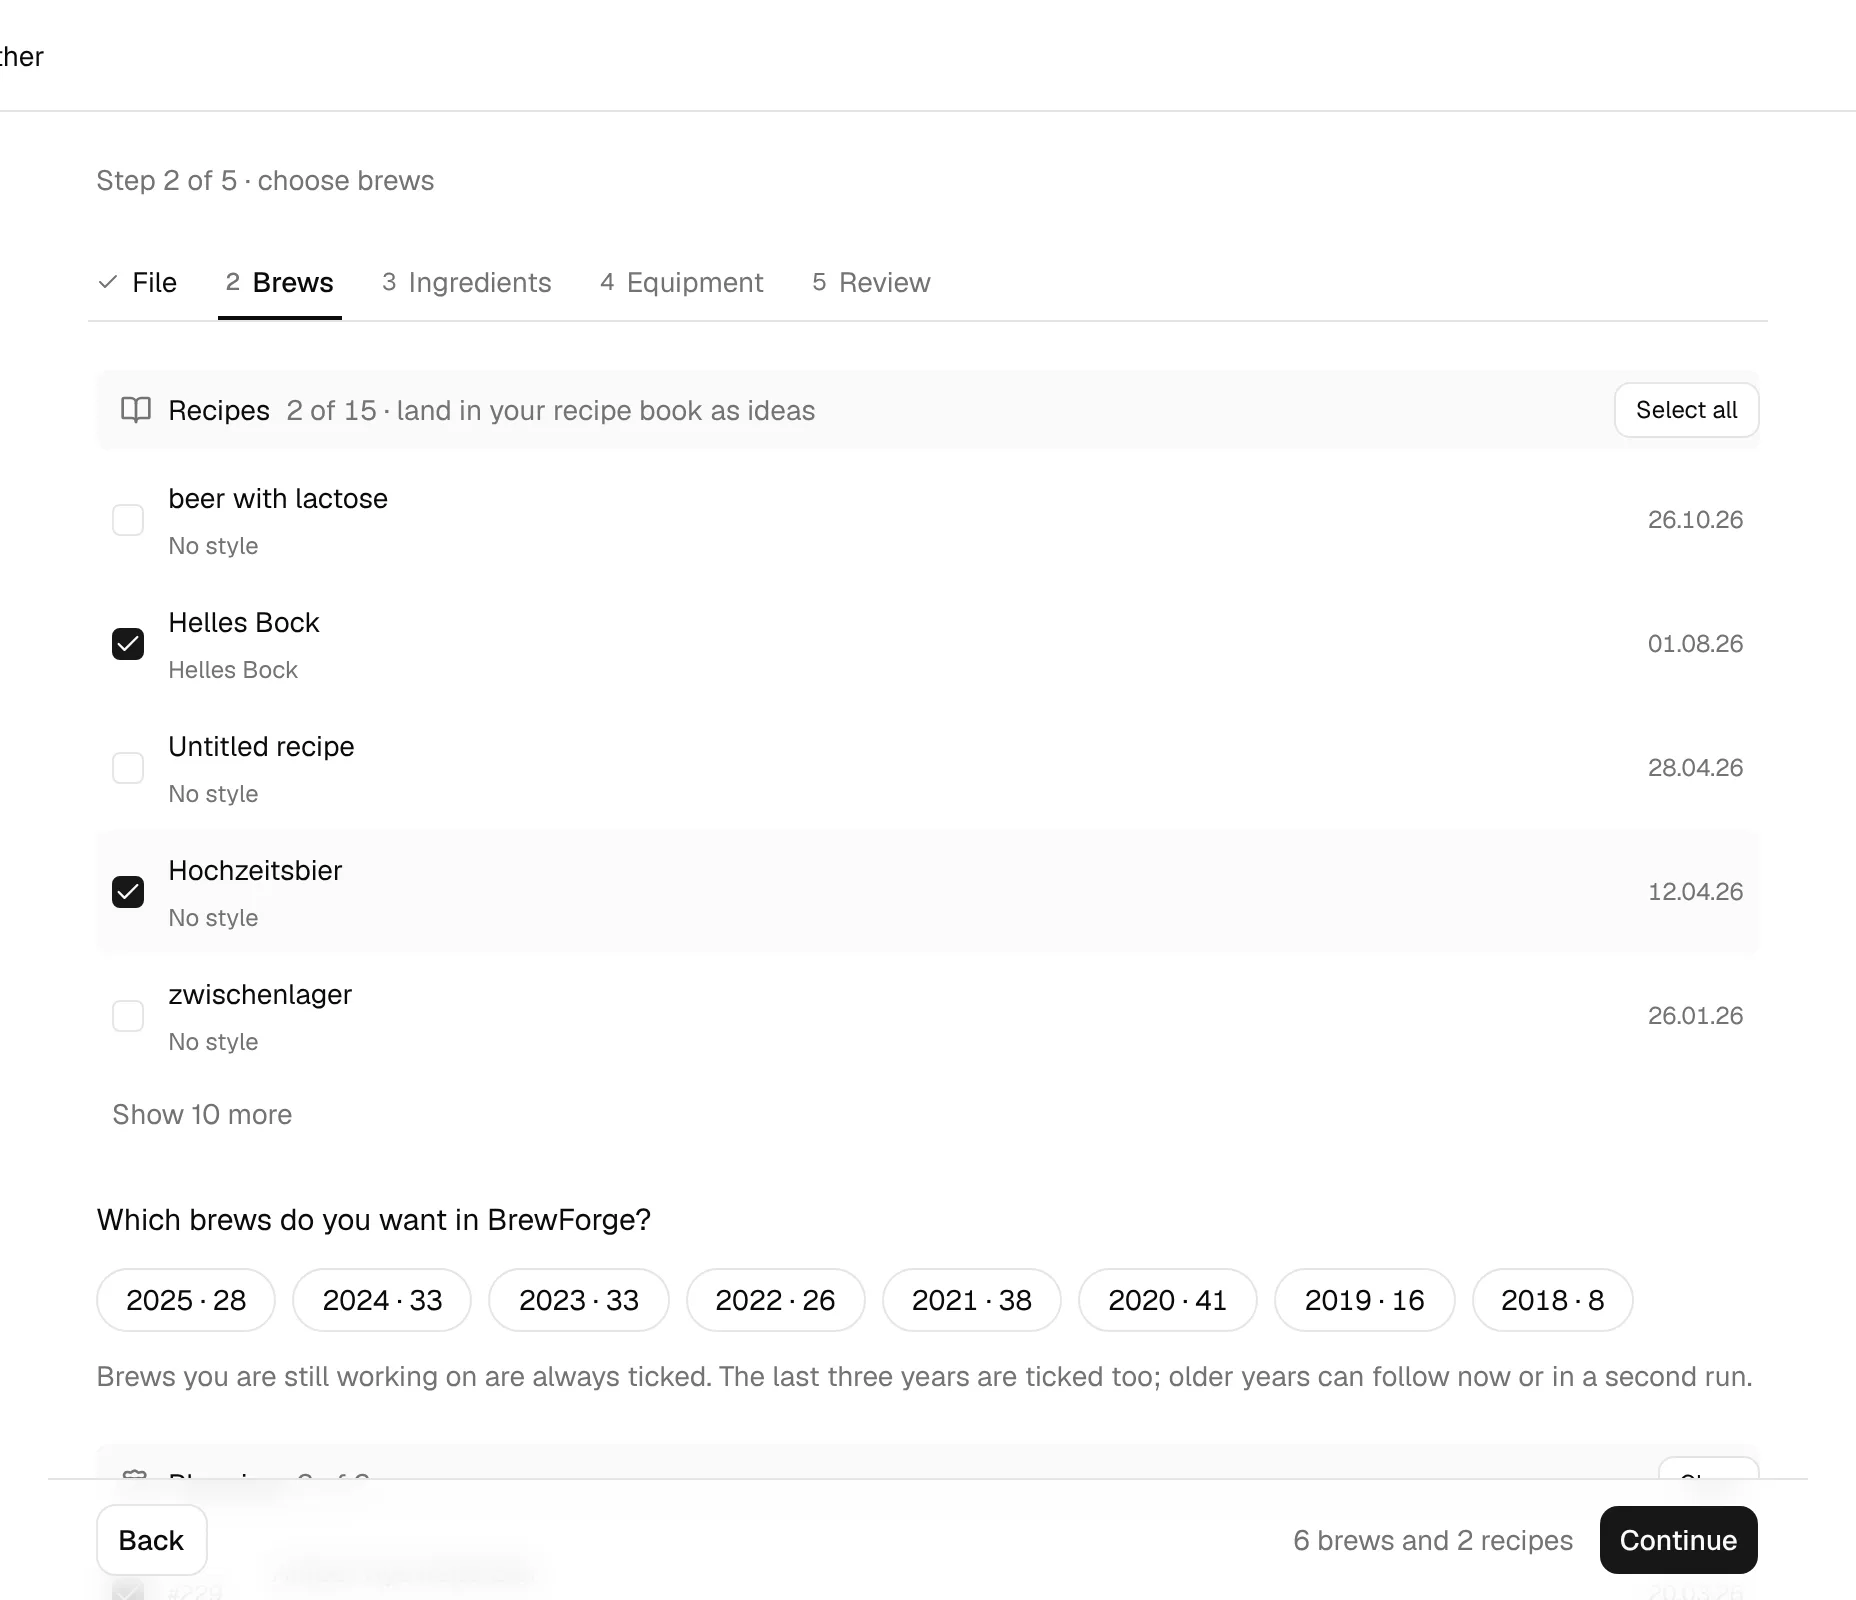
Recipes come first: the recipes saved in Brewfather that you haven't brewed. They land in your recipe book as ideas. All of them are ticked; the list shows five and Show N more opens the rest. Untick the ones you don't want, or use Clear and tick only a few.
Below, Which brews do you want in BrewForge? lists your batches:
- Brews you are still working on are grouped by their Brewfather status (Planning, Brewing, Fermenting, Conditioning) and are always ticked.
- Finished brews are grouped by brew year, newest first. The year chips (for example 2025 · 28) tick or untick a whole year. The last three years are ticked by default.
- Each group has Select all or Clear, and every brew has its own checkbox with batch number, style, equipment, OG and brew date.
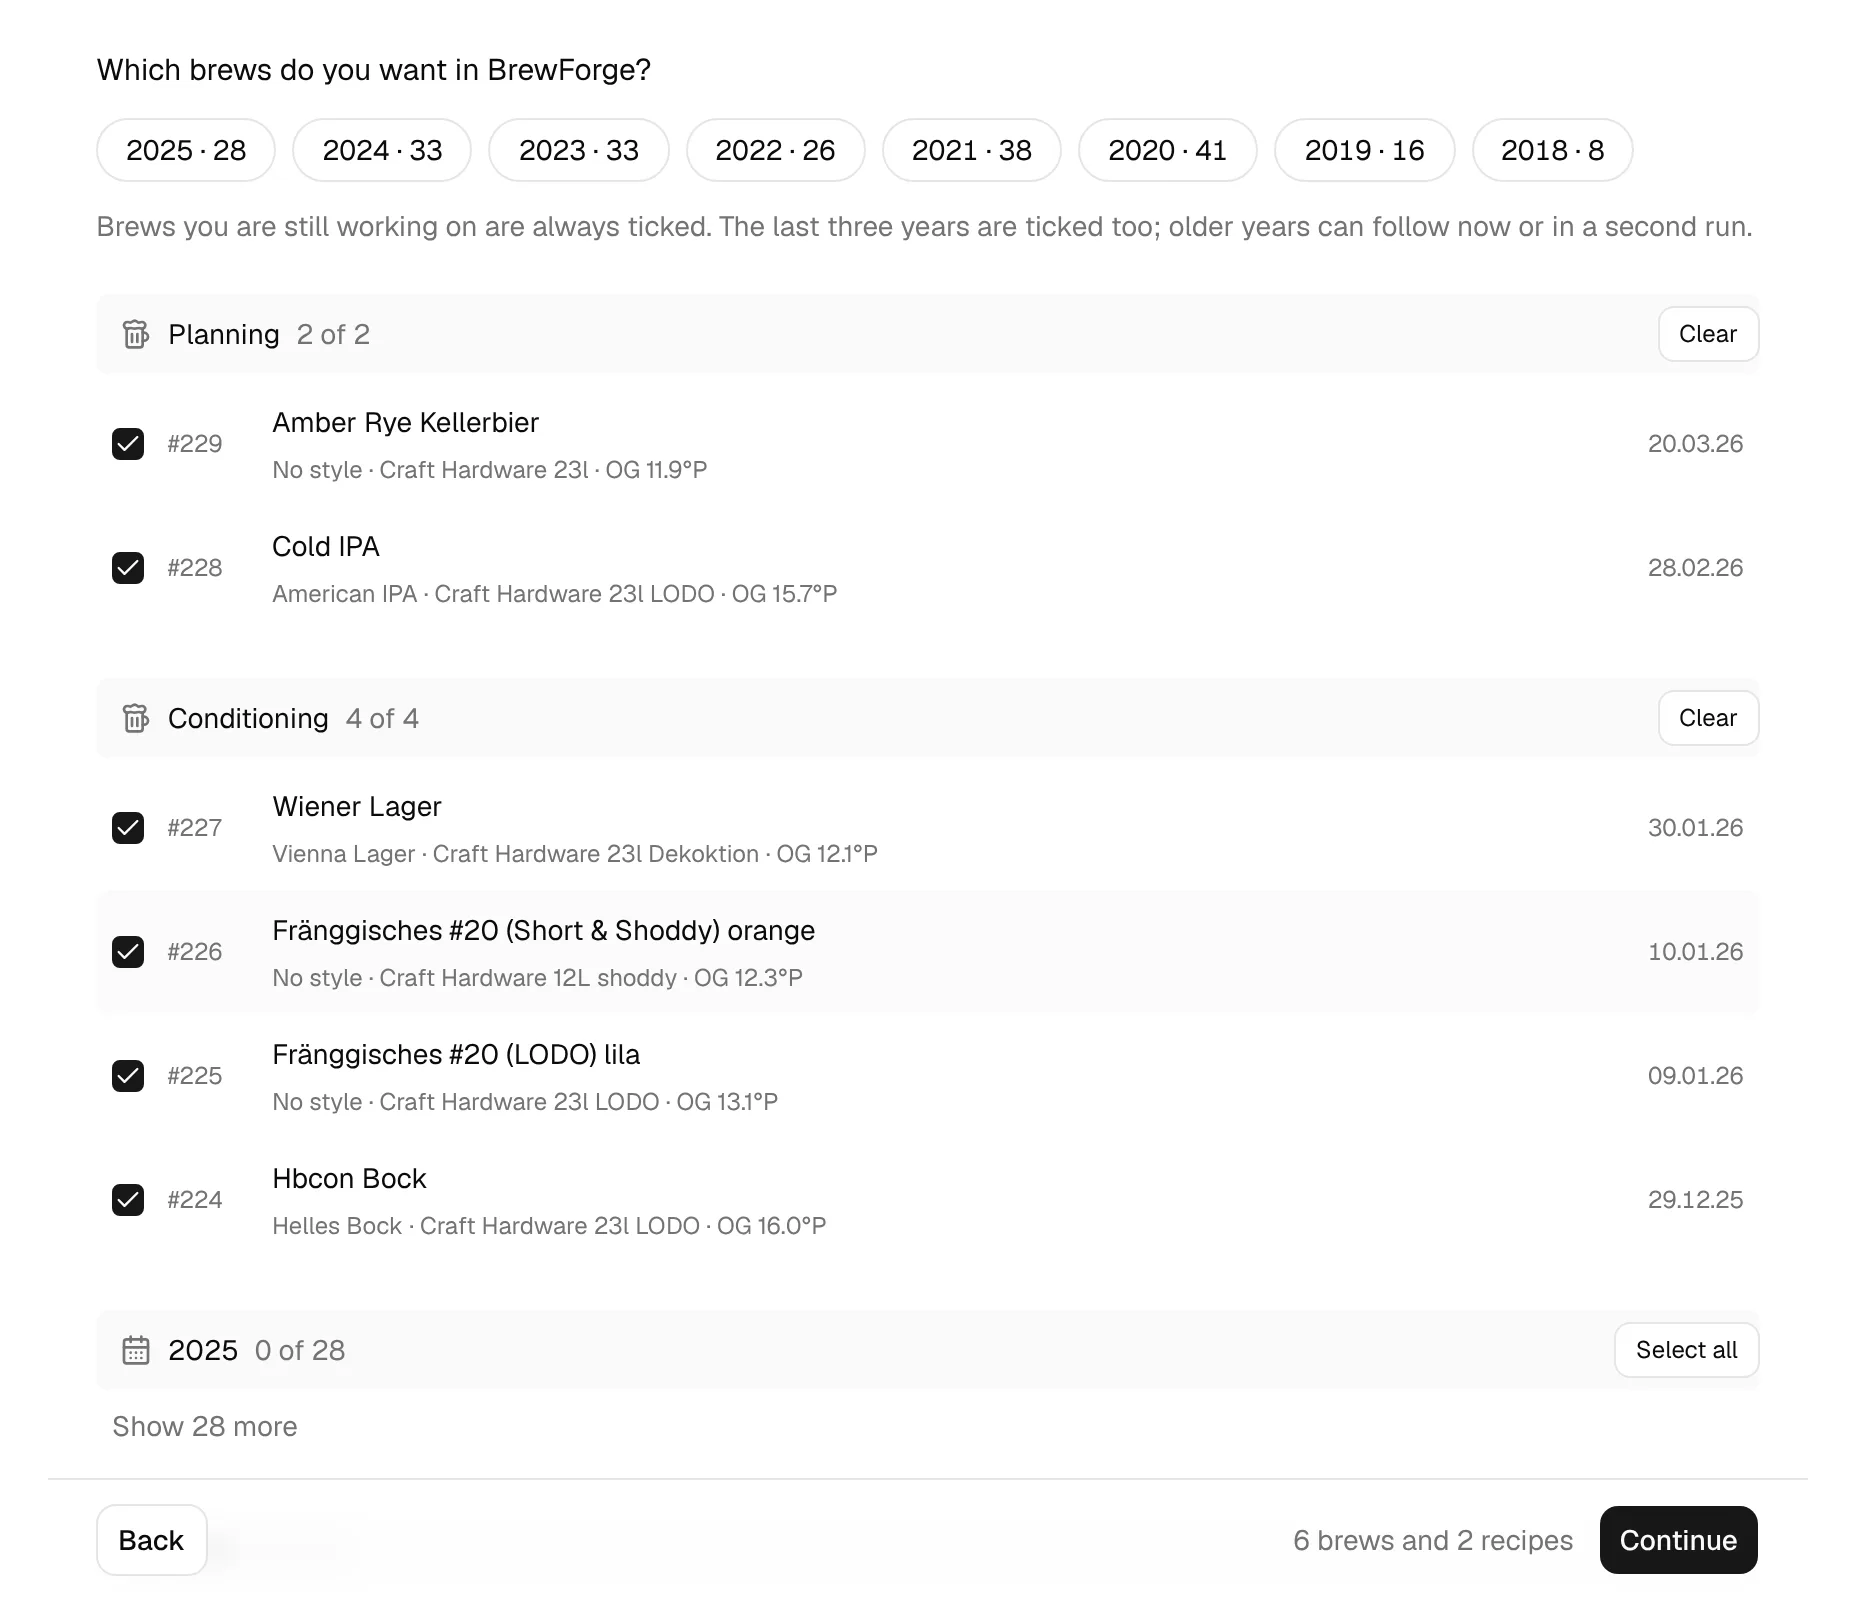
The bottom bar counts your selection, for example "6 brews and 2 recipes". You don't have to bring everything at once: brews you import later from the same backup are added, and the ones already in BrewForge are marked already imported and skipped.
Free plan limit
On the Free plan, a note at the top of the step says how many brews you have and how much room is left, for example "The free plan allows 20 brews, and you have 0. Room for 20 more: recipes count as brews too." If your selection doesn't fit, the note turns red, the bar says how many are too many and Continue stays disabled. Untick brews or recipes, delete brews you don't need, or upgrade for unlimited brews.
Step 5: Match ingredients (Ingredients)
BrewForge looks up every ingredient your selected brews and recipes use in its ingredient packages. A match gives you full specs and supplier data, and stock that works across all your brews. The first lines count how many were found in packages, how many are to check, and how many become your own ingredients.
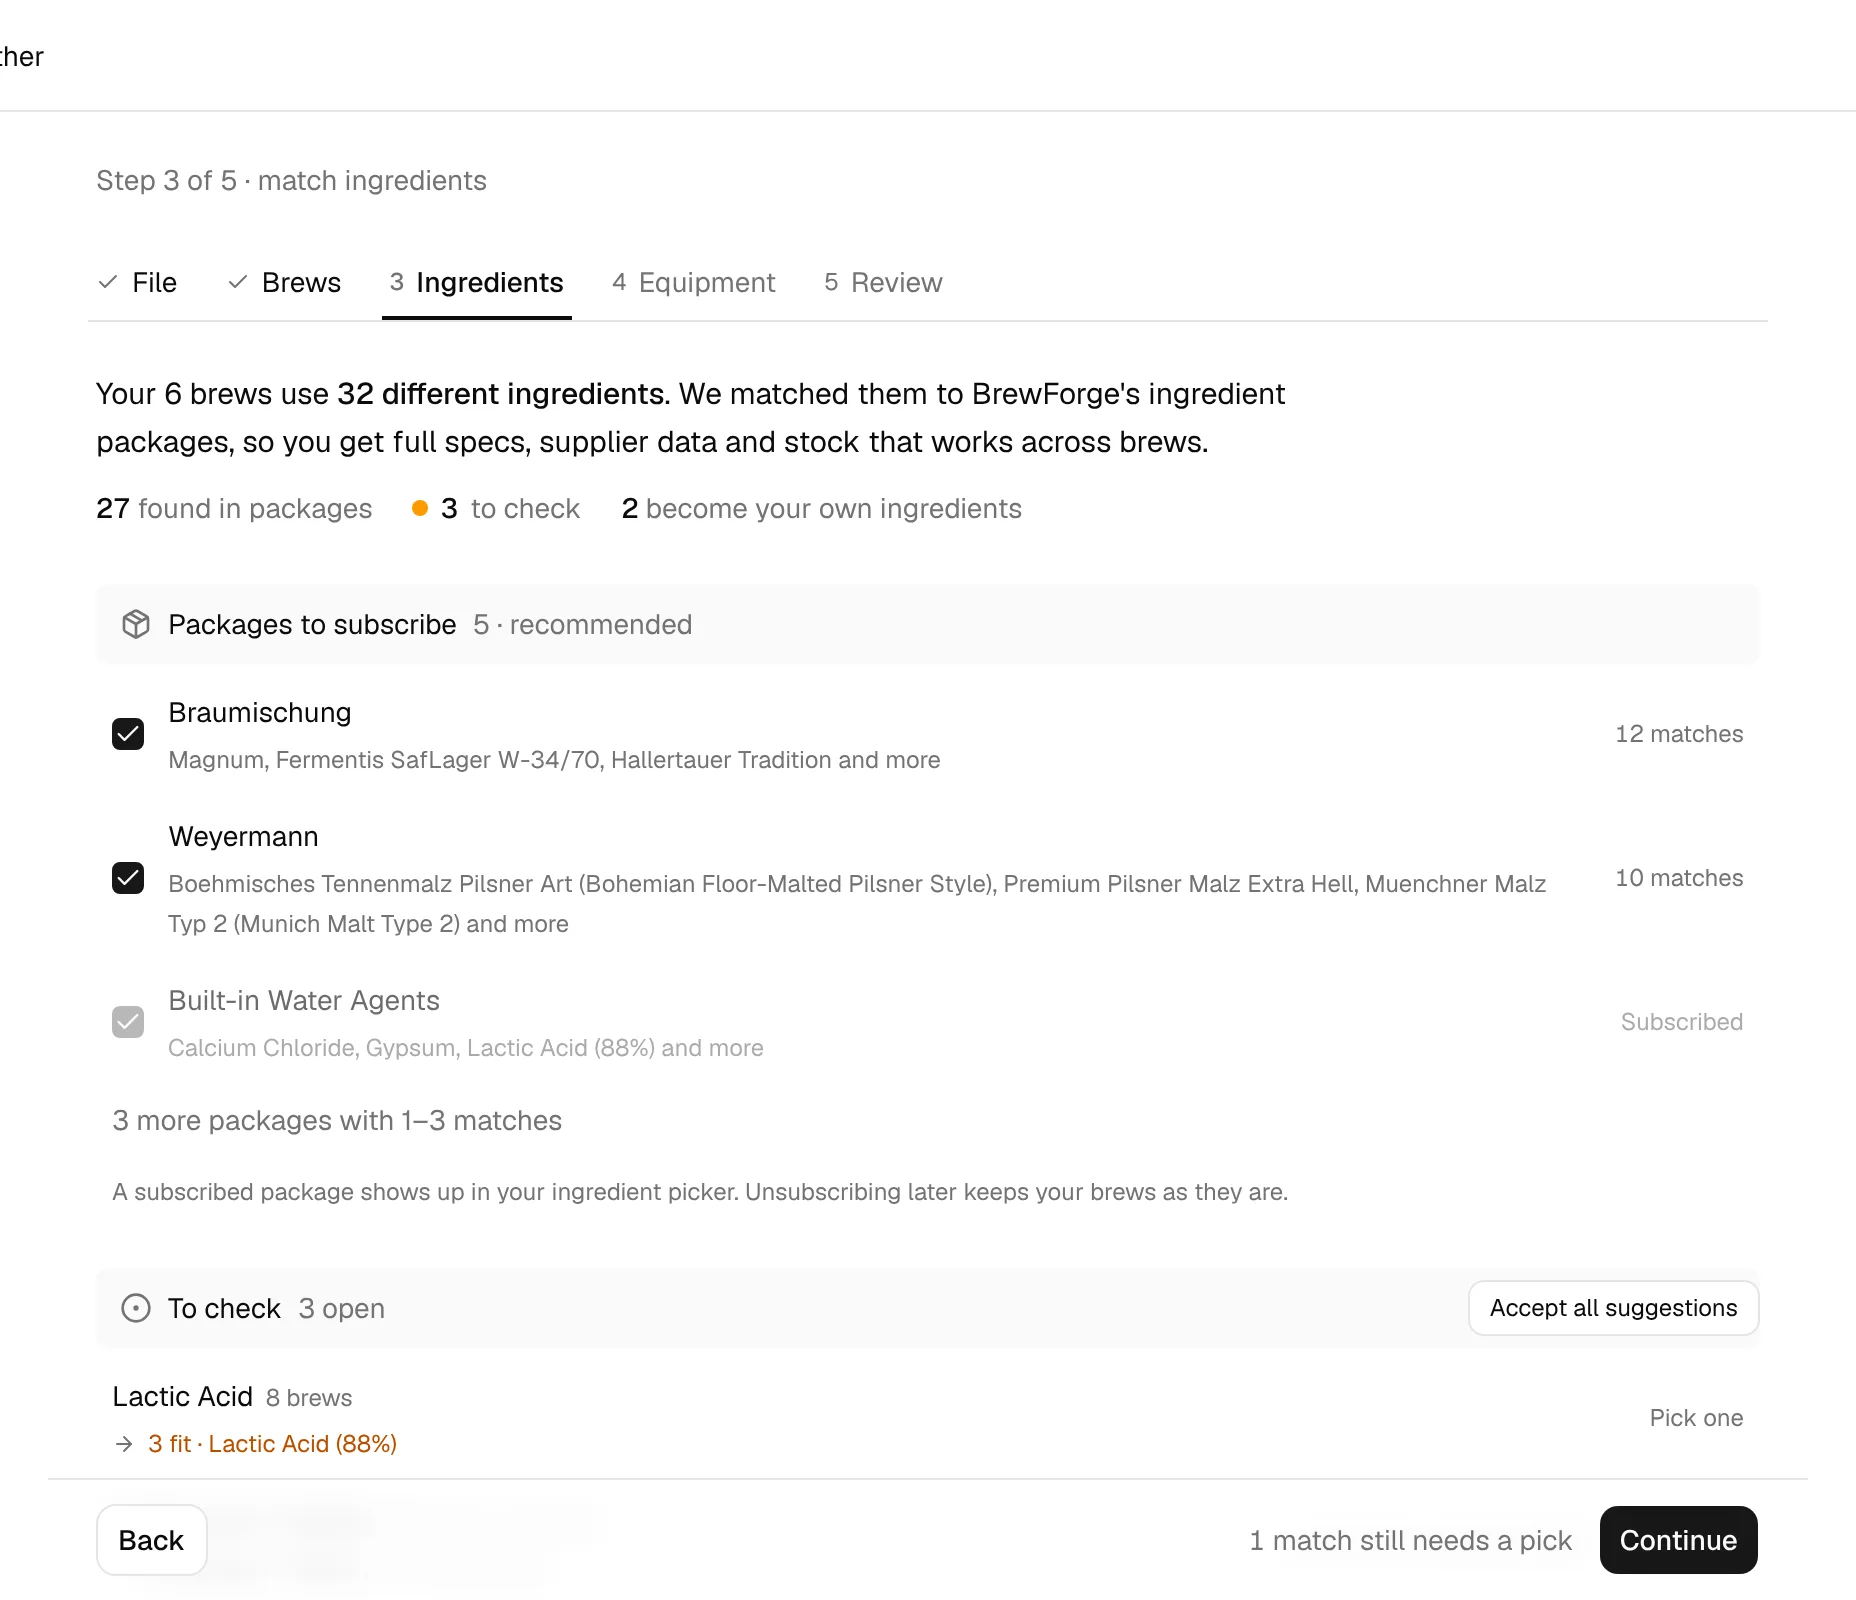
The step has four sections:
- Packages to subscribe: the packages your matches come from, recommended and ticked. Each shows example ingredients and how many matches it brings. Packages with only one to three matches sit behind one line. Packages you already subscribe to show Subscribed. A subscribed package shows up in your ingredient picker; unsubscribing later keeps your brews as they are.
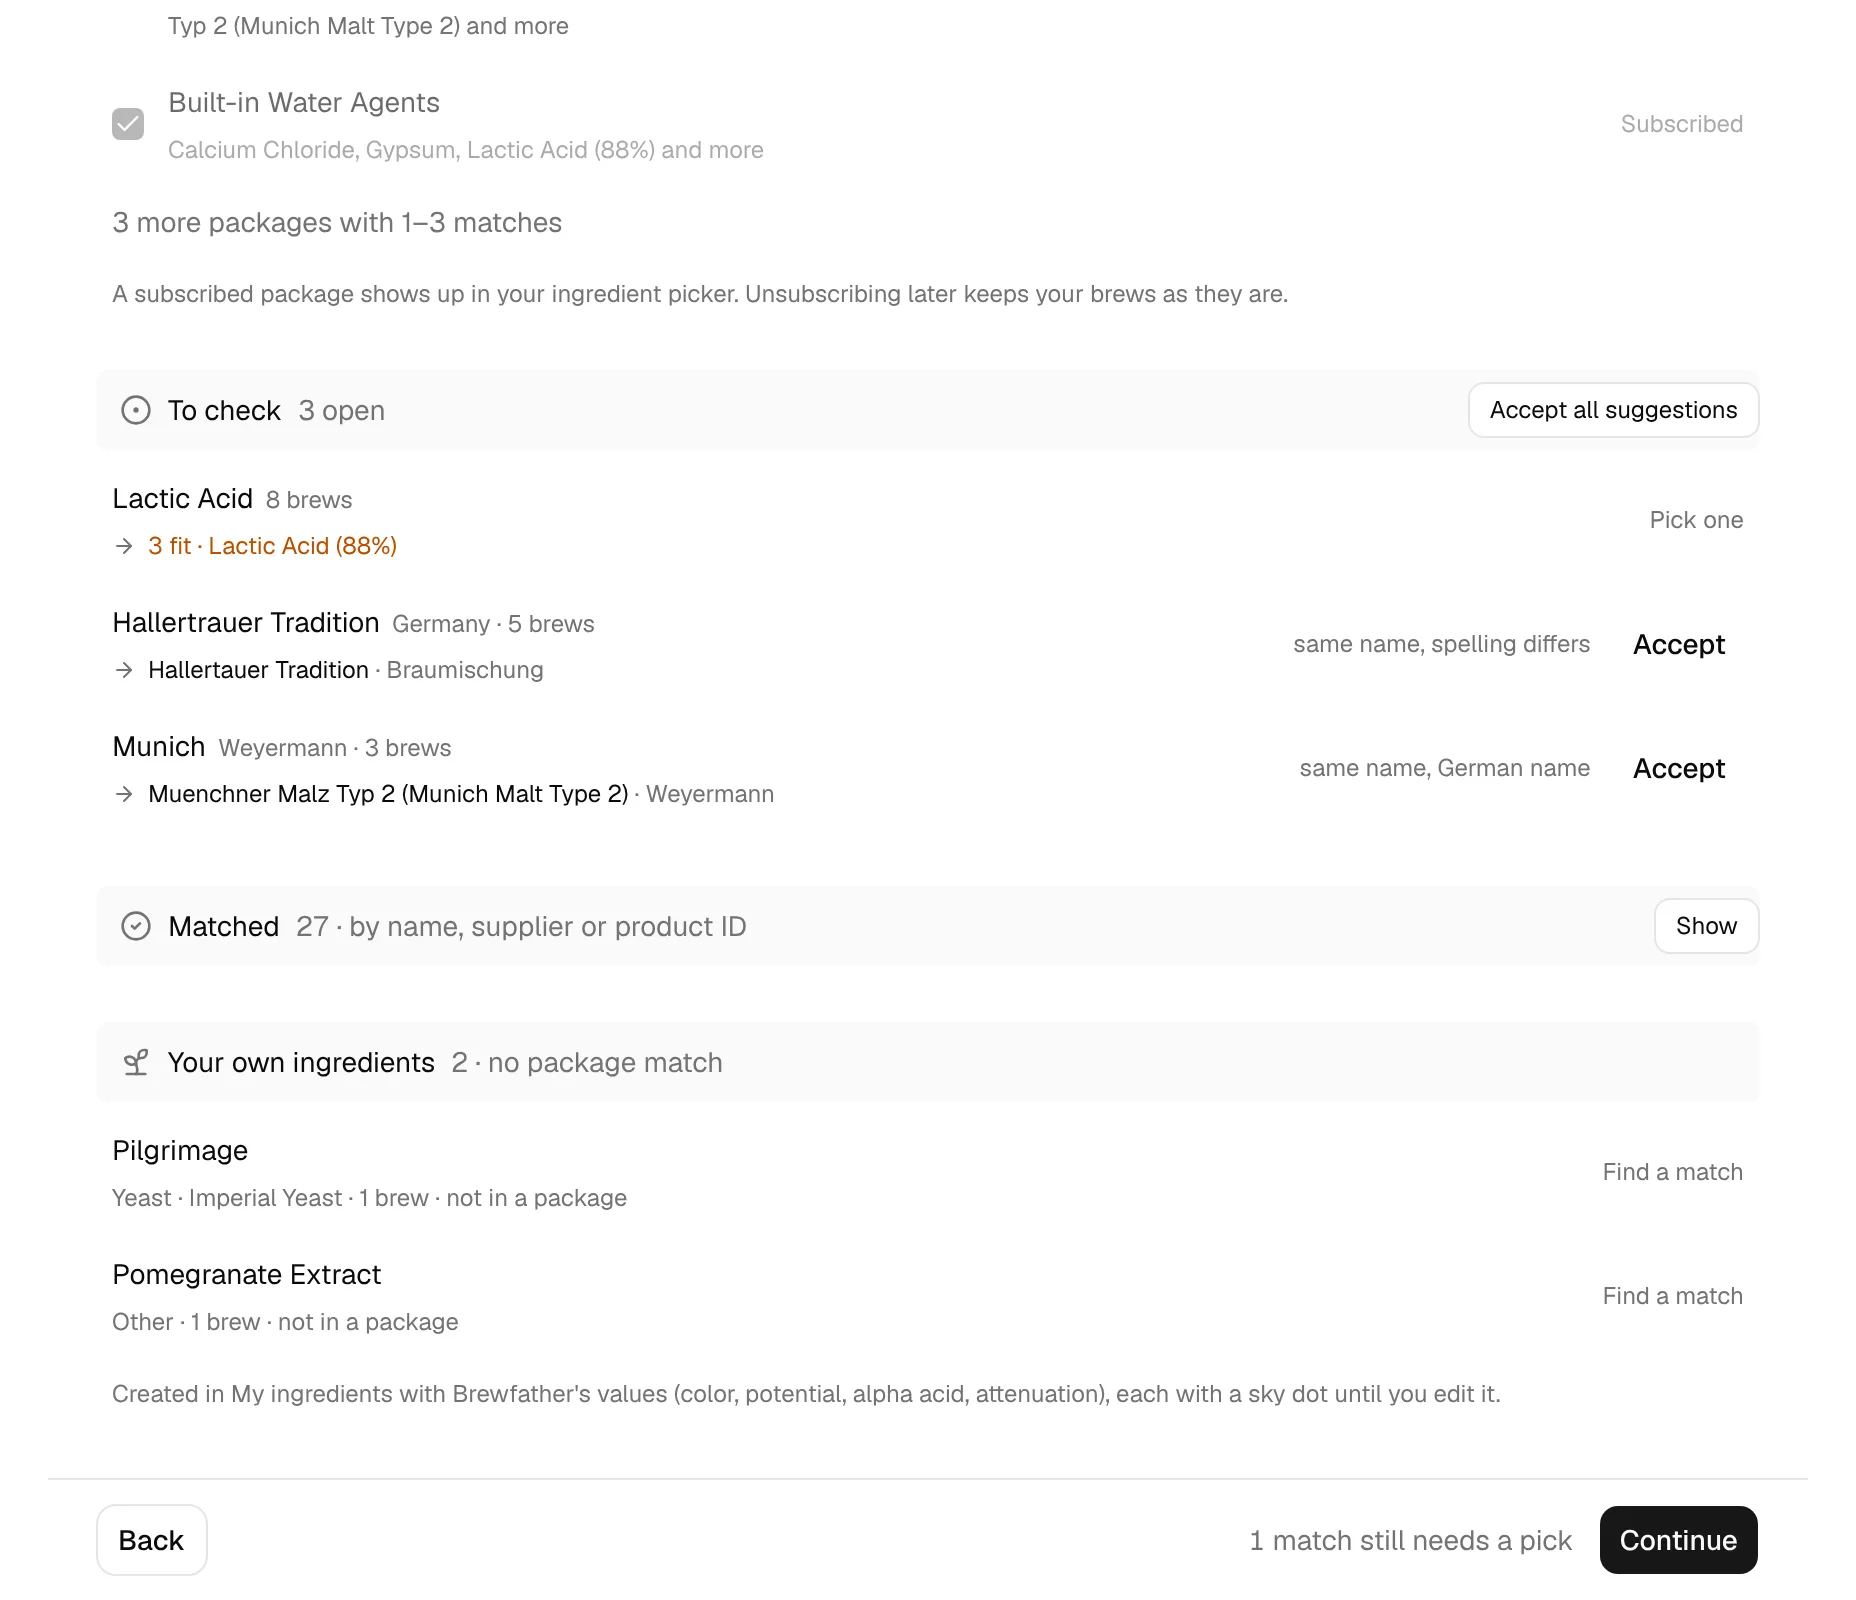
- To check: ingredients where BrewForge isn't sure. Accept takes the suggestion, Pick one means several fit and you choose. Accept all suggestions accepts every open suggestion at once.
- Matched: ingredients matched by name, supplier or product ID. The list is folded; Show opens it, and clicking a row lets you change the match.
- Your own ingredients: ingredients no package has. They are created as your own ingredients with Brewfather's values (color, potential, alpha acid, attenuation) and marked with a sky dot until you edit them. Find a match lets you link one to a package ingredient instead.
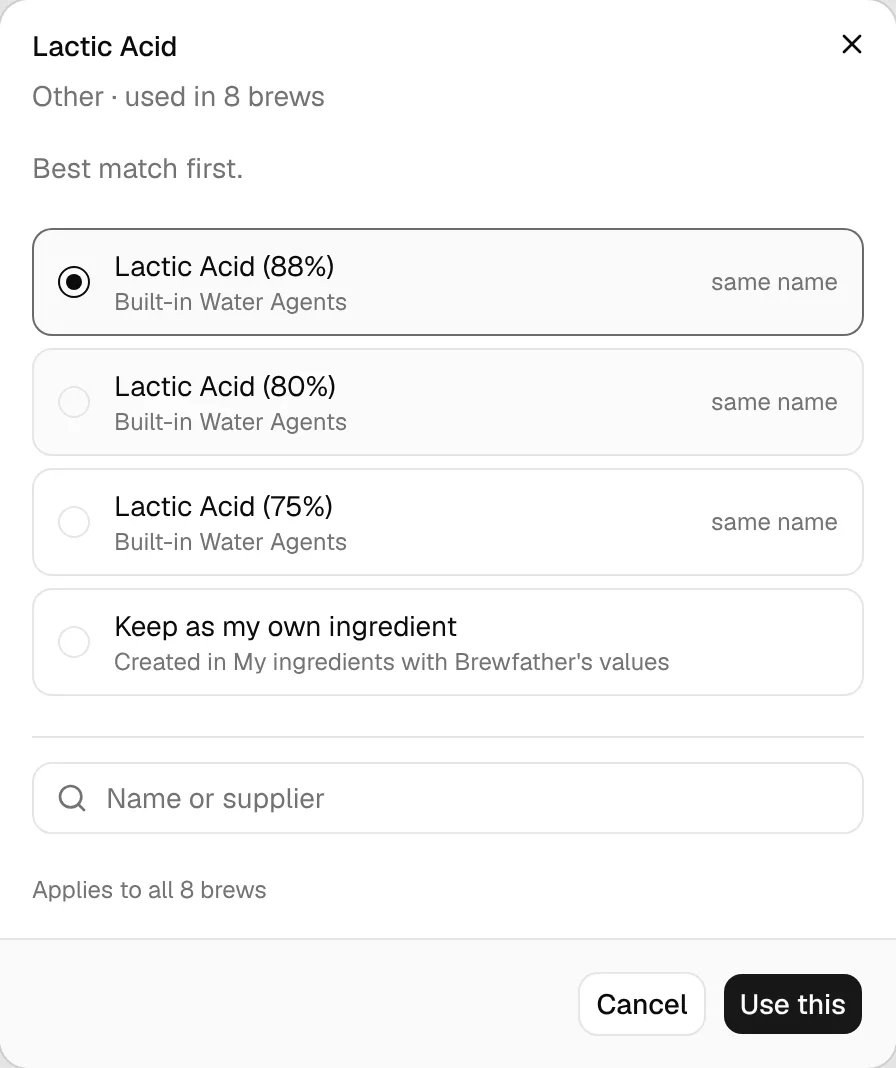
Clicking an ingredient opens a dialog with the candidates, best match first. For malts, hops and yeasts it sorts by the closest color, alpha acid or attenuation and shows the Brewfather value. Search all ingredients finds any ingredient by name or supplier, and Keep as my own ingredient skips the match. Use this applies your choice to every brew that uses the ingredient.
The bar shows how many matches still need a pick. You can continue anyway: open matches become your own ingredients.
Step 6: Equipment and profiles (Equipment)
Every imported brew keeps the exact equipment values it was brewed with. In this step you only decide which setups become equipment profiles for your next brews.
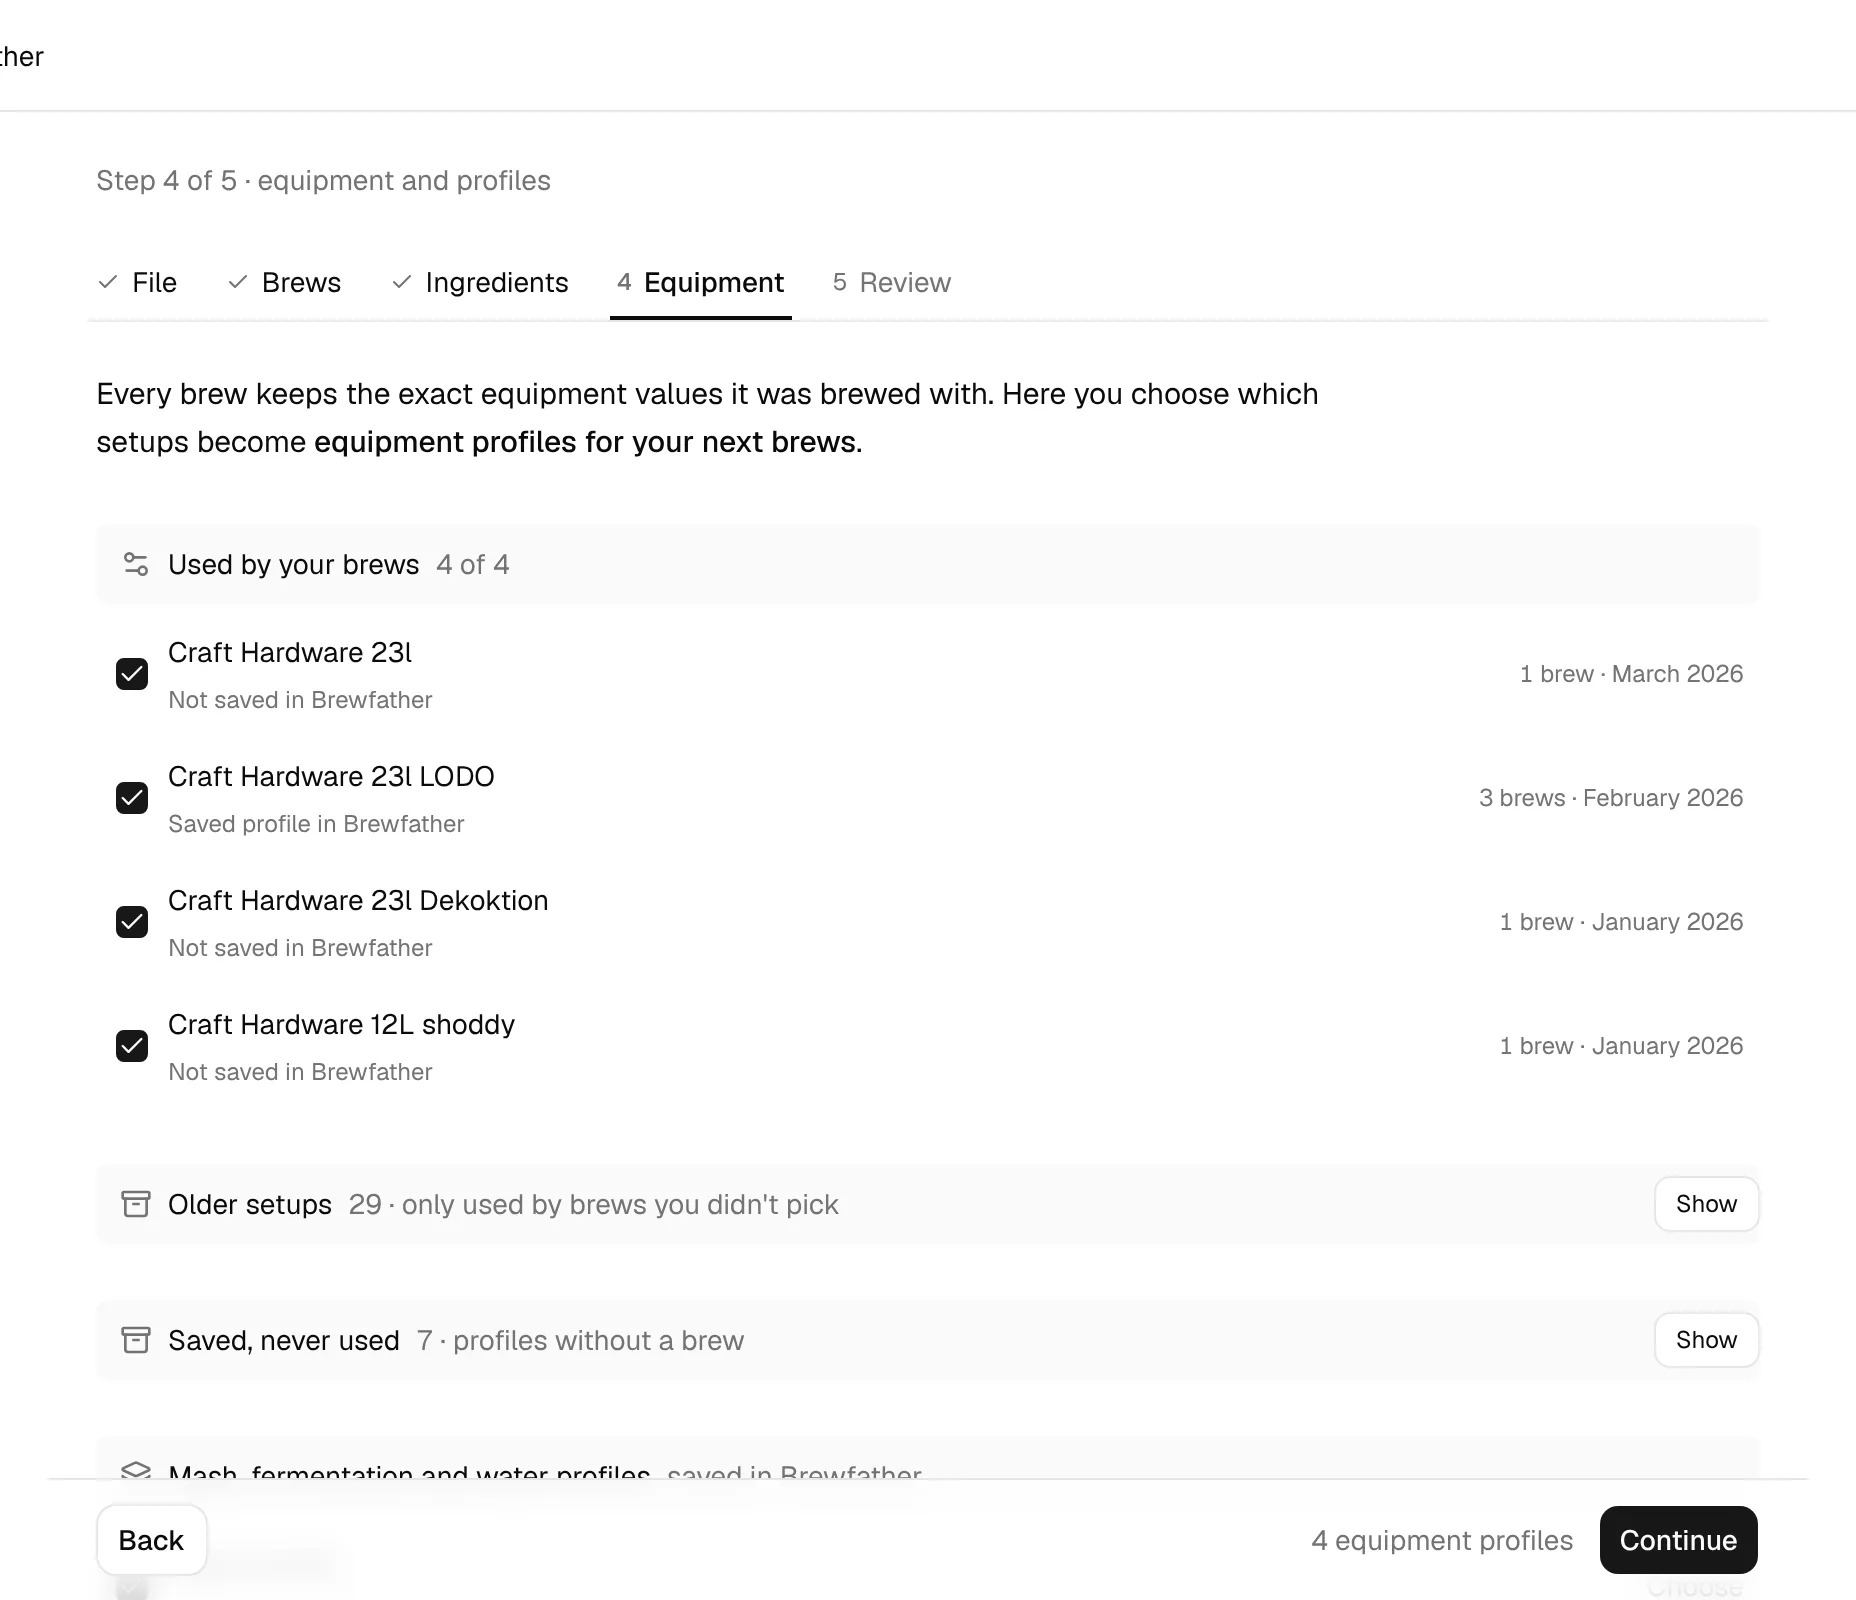
- Used by your brews: the setups your selected brews use, ticked. Each row says whether it was a Saved profile in Brewfather or only stored inside brews (Not saved in Brewfather), and how many brews used it and when.
- Looks like one setup: appears when several setup names only differ by a setting. Tick it to merge them into one profile with the latest values.
- Older setups (only used by brews you didn't pick) and Saved, never used (profiles without a brew) are folded and unticked. Show opens them.
- Mash, fermentation and water profiles: your saved profiles per type, all ticked. Choose picks them by name. The mash and fermentation steps of each brew always come along with the brew; water profiles include source and target water.
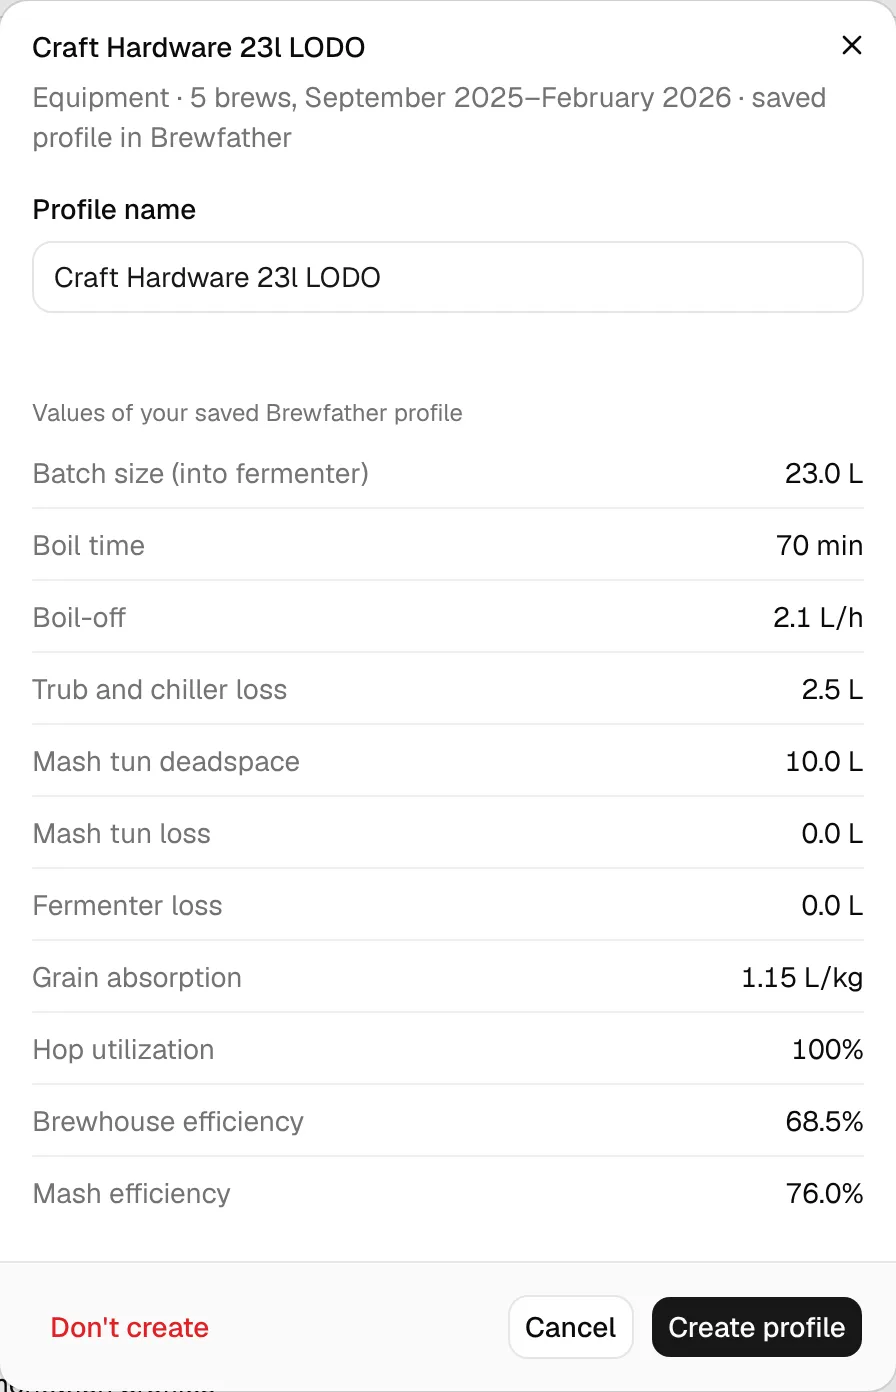
Click a setup to see its values. You can rename the profile, check the values (batch size, boil time, boil-off, losses, grain absorption, hop utilization and efficiencies) and see when the settings changed over time. A value Brewfather didn't have shows not set and the default BrewForge uses instead. Create profile ticks the setup, Don't create unticks it.
Step 7: Check and import (Review)
The last step sums up the import.
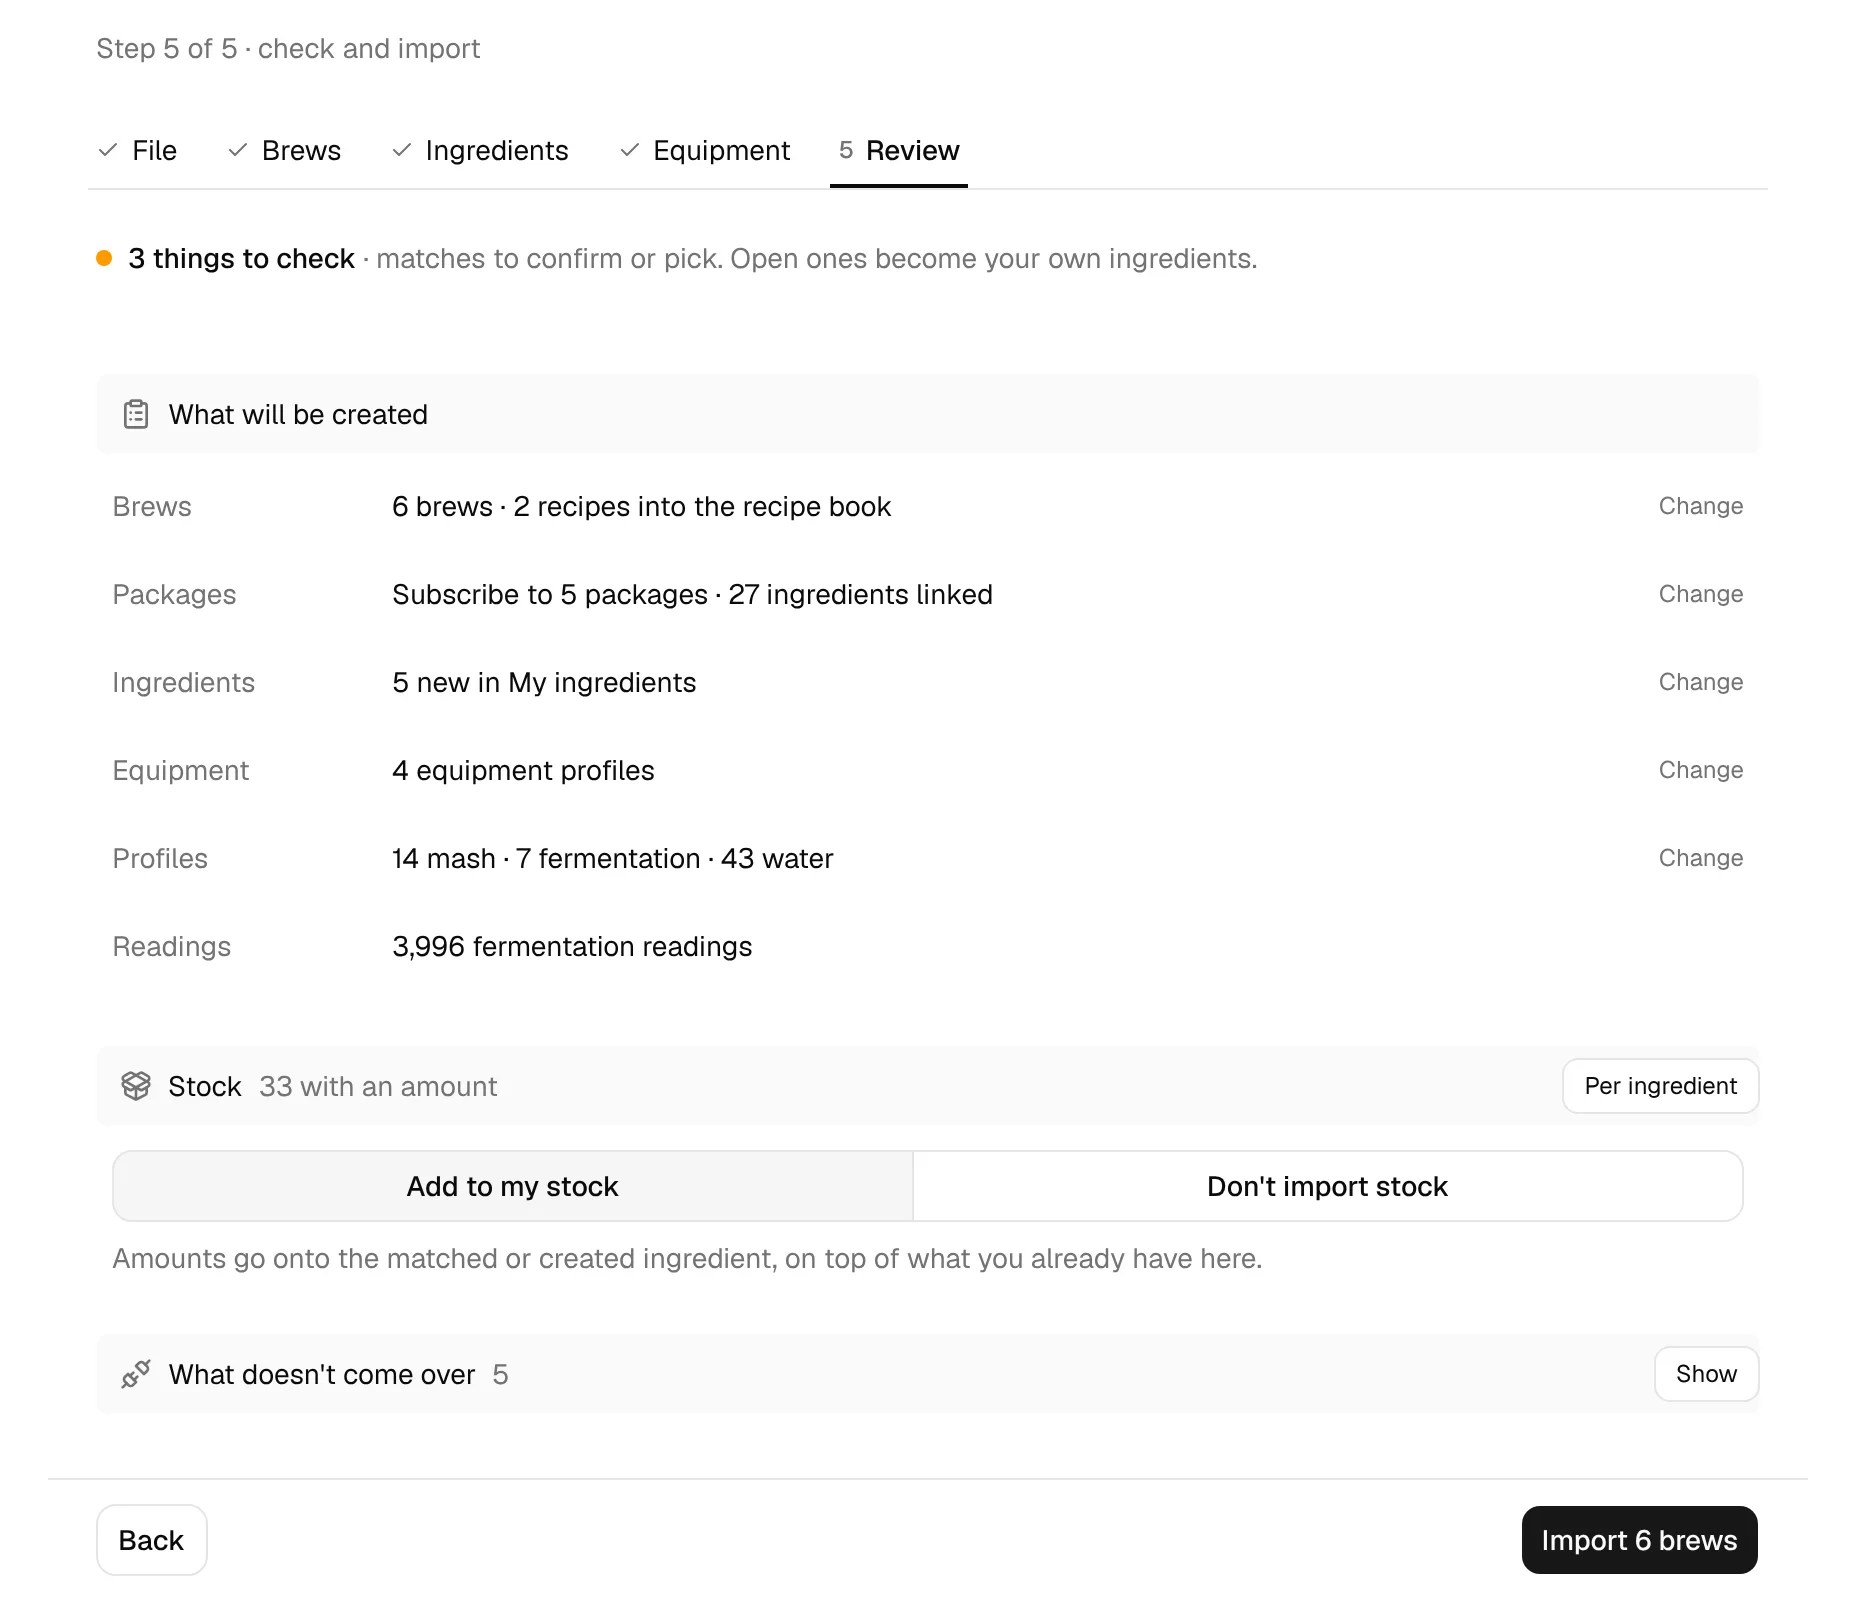
- The first line says how many things to check are left (open ingredient matches). Click it to go back to the Ingredients step.
- What will be created lists brews and recipes, package subscriptions and linked ingredients, new own ingredients, equipment profiles, mash, fermentation and water profiles and the number of fermentation readings. Change jumps to the step where you set it.
- Stock decides what happens with the amounts from your Brewfather inventory: Add to my stock puts them onto the matched or created ingredient, on top of what you already have; Don't import stock brings only recipes and brews. Per ingredient changes the choice for single items.
- What doesn't come over (folded) explains what stays in Brewfather: live device connections (the readings they logged do come over; connect the devices in BrewForge for new readings), planned events and trackers (fermentation steps and dry hops are rebuilt from each brew), recipe versions and folders (only the current version comes over), recipe images, and batch cost totals (BrewForge recalculates costs from ingredient prices).
Click Import N brews (or Import N recipes if you only picked recipes).
Step 8: The import runs
The import runs in phases: subscribing to packages, creating ingredients, creating equipment and profiles, importing brews and recipes, adding stock and linking the fermentation readings. Each phase shows its progress.
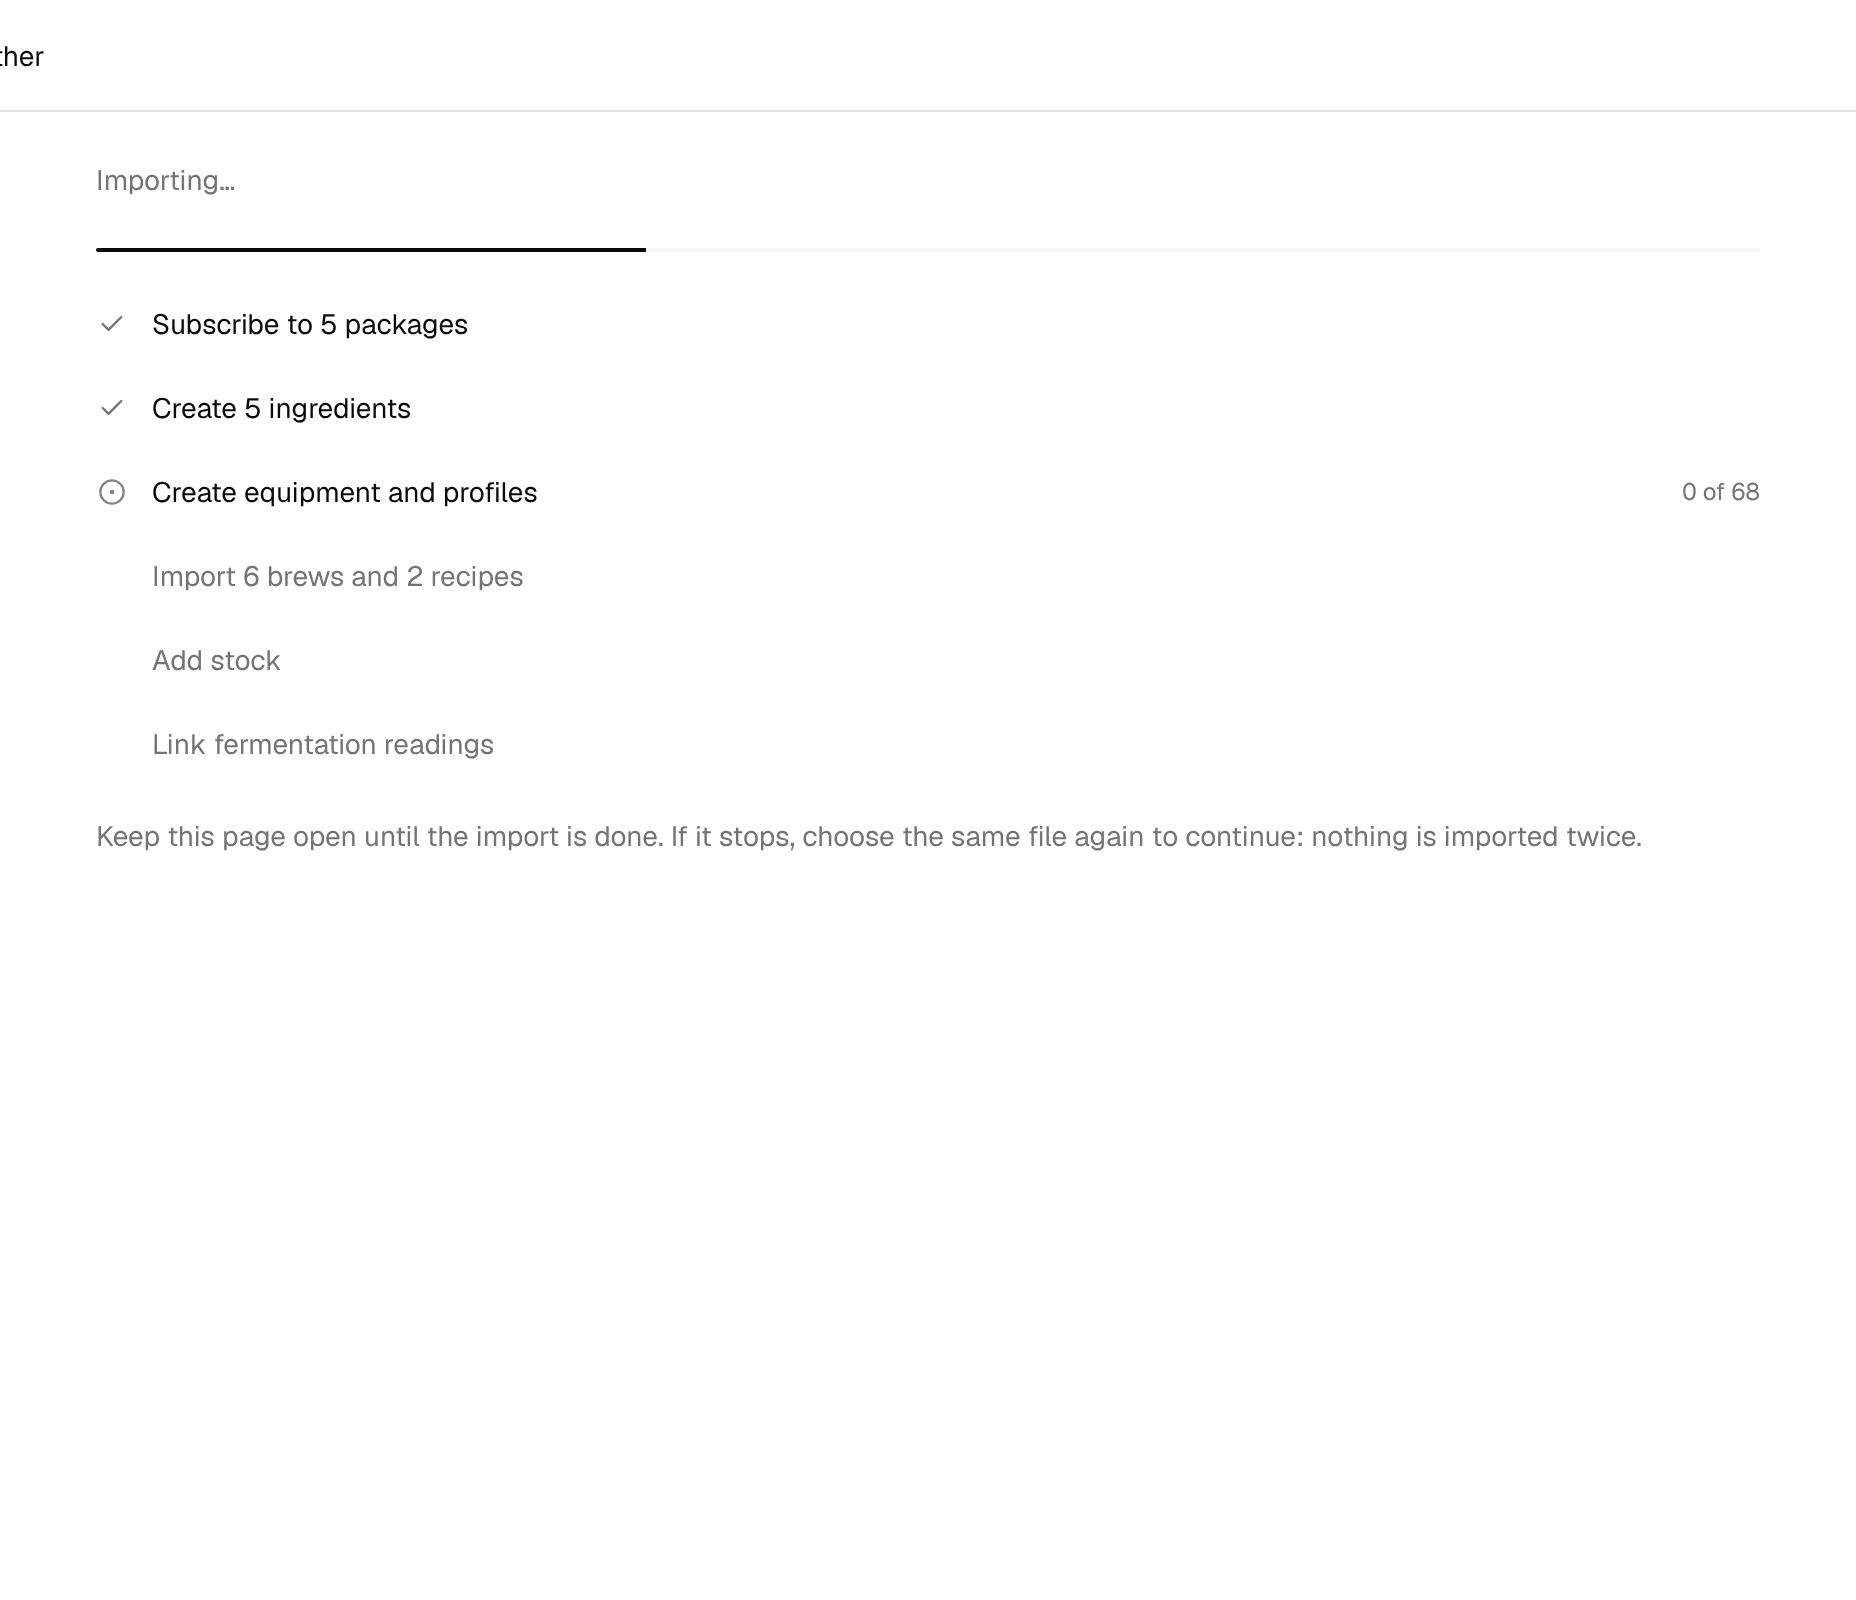
Keep the page open until the import is done. If you close it, your browser asks first. If the import stops, open the import again and choose the same file: An import didn't finish offers Continue that import, and nothing is imported twice.
Step 9: Done
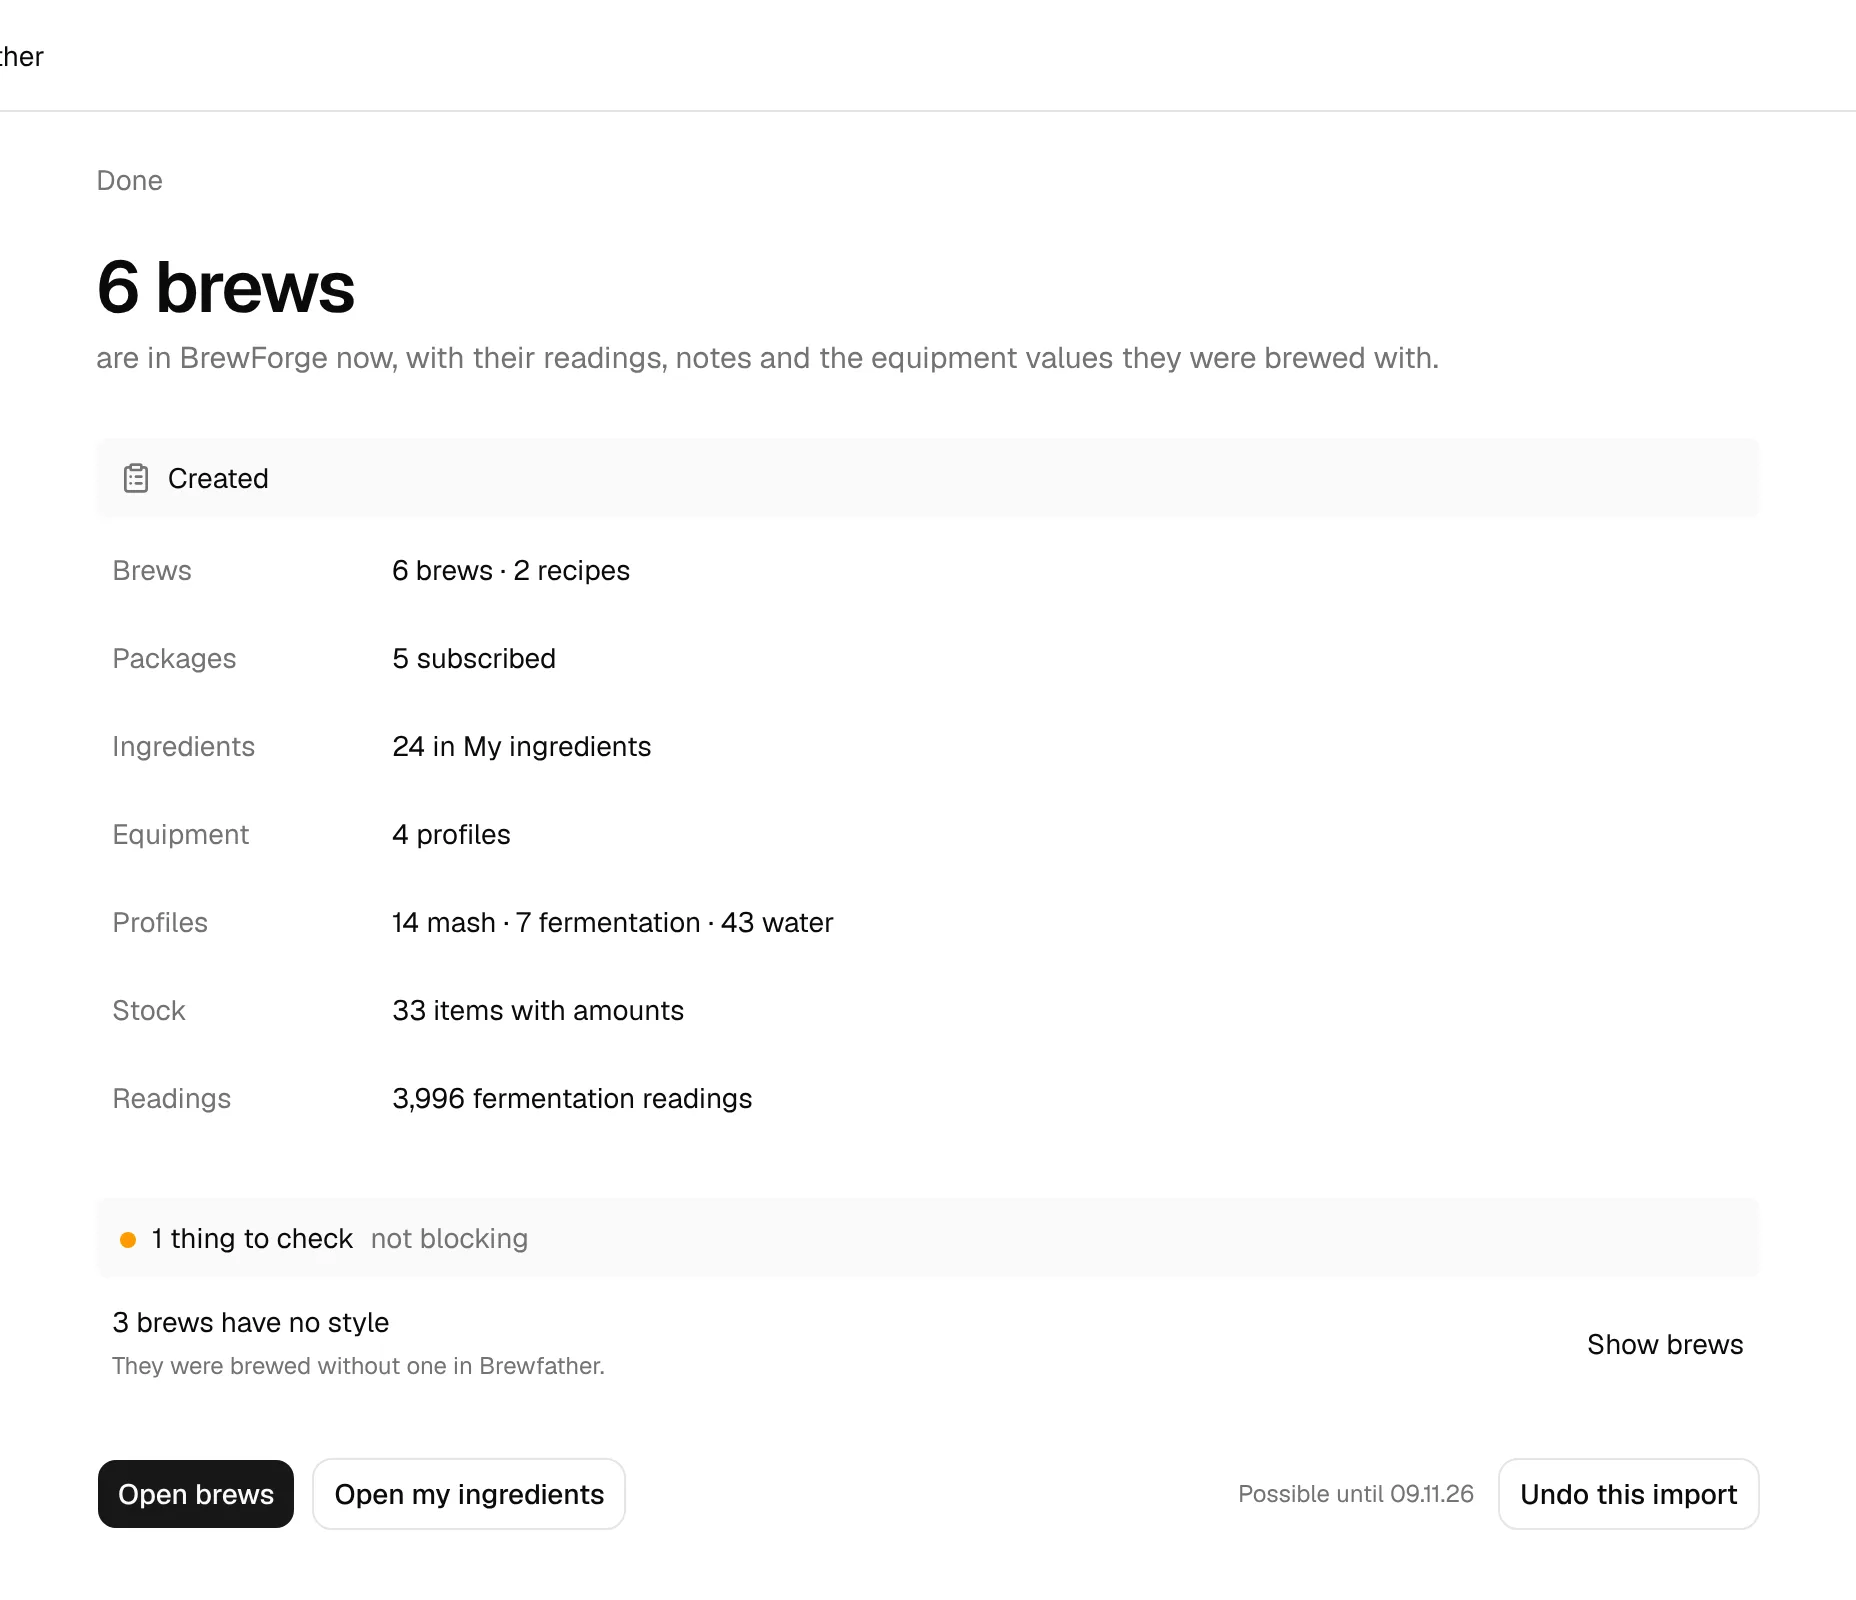
The done page shows how many brews (or recipes) are now in BrewForge, what was Created, and things to check that don't block anything, for example equipment profiles with a value Brewfather didn't have, or brews without a style. Open brews takes you to your brews, Open my ingredients to My Ingredients.
Undo an import
For 7 days you can take an import back with Undo this import, on the done page or later under Recent imports on the File step. Undo removes the brews with their readings, and the ingredients, profiles, package subscriptions and stock the import added. Brews with beer left in the cellar are kept.
What maps where
| Brewfather | BrewForge | Notes |
|---|---|---|
| Batches | Brews | Status mapped: Planning → Planned, Brewing → Brew Day, Fermenting → Fermenting, Conditioning → Conditioning, Completed → Completed, Archived → Archived. Tagged brewfather-import |
| Recipes | Brews with status Idea in the recipe book | Tagged brewfather-import |
| Fermentation readings | Readings on the brew's Fermentation tab | From the backup |
| Equipment setups | Equipment profiles | Only the ones you tick; each brew keeps its own equipment values |
| Mash, fermentation, water profiles | Profiles of the same kind | Marked as imported |
| Ingredients in recipes | Package ingredients or your own ingredients | Matched in the Ingredients step |
| Inventory amounts | Stock on the matched ingredient | Optional, step Review |
| Batch notes | Brew notes |
Your own ingredients from the import show Brewfather import as their source in the inventory. See Ingredient library to move them to My Ingredients.
Brewfather's numbers vs. BrewForge's numbers
BrewForge stores Brewfather's calculated values for each imported brew (OG, FG, ABV, IBU, color, attenuation, water volumes and mash pH) as import overrides. Your imported brews therefore show the same numbers you saw in Brewfather, computed with Brewfather's formulas and settings. An import icon marks these values. The gravities you measured on brew day are imported separately and take priority over the calculated values.
You can switch an imported recipe to BrewForge's own calculations later, for example when you brew it again with your BrewForge equipment profile.
Troubleshooting
| Problem | Solution |
|---|---|
| "That's not a Brewfather backup" or "This JSON file isn't a Brewfather export" | Choose the .zip from Export backup (or the .json from Export user data to JSON), not a recipe or BeerXML export. |
| "This zip has no backup.json inside" | Choose the backup zip from Brewfather as downloaded, not a zip you packed yourself. |
| "This file is too big to import here (over 400 MB)" | The import reads files up to 400 MB. |
| Continue is disabled on the Brews step | Pick at least one brew or recipe. On the Free plan, the selection must fit into your remaining brews. |
| "Matching didn't work" | Click Try again. Your choices are kept. |
| The import stopped | Open the import and choose the same file, then Continue that import. Brews already imported are skipped. |
| "N items didn't come over" on the done page | Run the import again with the same file to retry them. |
| An equipment profile has a missing value | Brewfather had no value, so the BrewForge default is used. Open the profile in Profiles and set it. |
| Values differ from what BrewForge calculates | Imported brews keep Brewfather's calculated values until you switch them to BrewForge's calculations. |
Other imports
Recipes from BeerSmith, Brewer's Friend and other tools: BeerXML import. Recipes from MaischeMalzundMehr: MMuM import.