Label templates
Create a label template in BrewForge's label designer. Choose a Niimbot label size or a custom size, add text with brew placeholders like beer name, ABV and batch number, add your brewery logo and position everything in millimetres.
A template is the layout of a label: its size and shape, and the texts and logo on it. Texts can contain placeholders such as {{name}} or {{abv}}, which are replaced with the values of the brew you print for.
Create a template
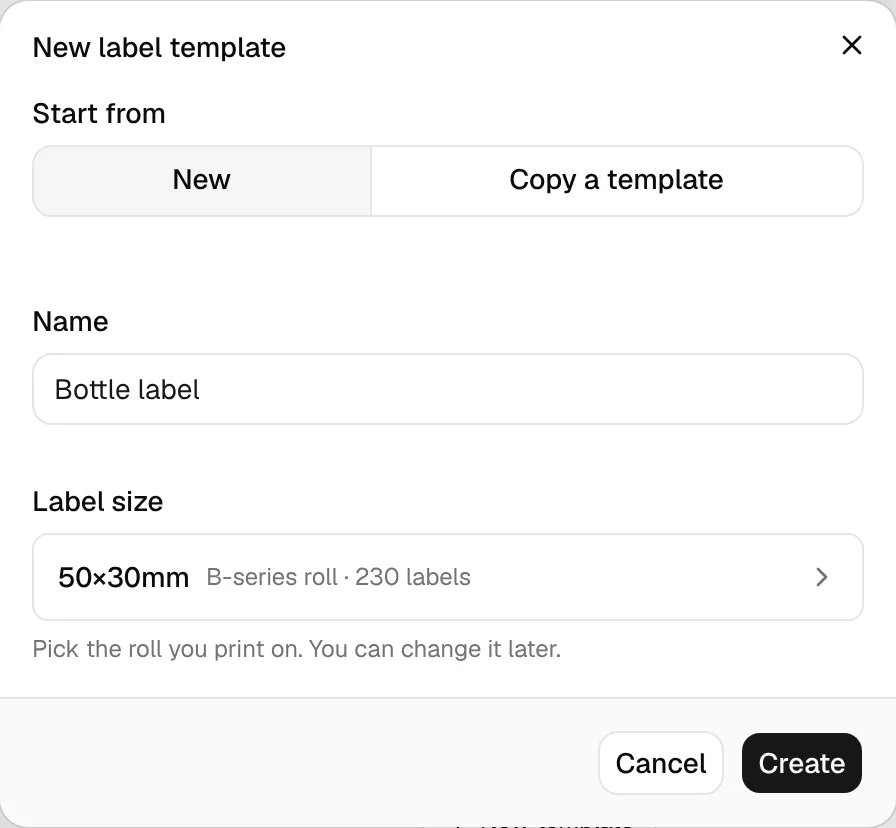
On Labels, click New template in the Templates section.
Choose how to start: New, or Copy a template to start from one you already have. For a copy, pick the template and check its name.
For a new template, enter a Name and click the Label size to pick your roll (see below).
Click Create. The template opens in the designer, starting with two texts: the beer name and the style.
The designer
The designer shows the label on the left, at a size you can work with (the line under it gives the actual size). On the right is the list of elements, or the settings of the element you selected.
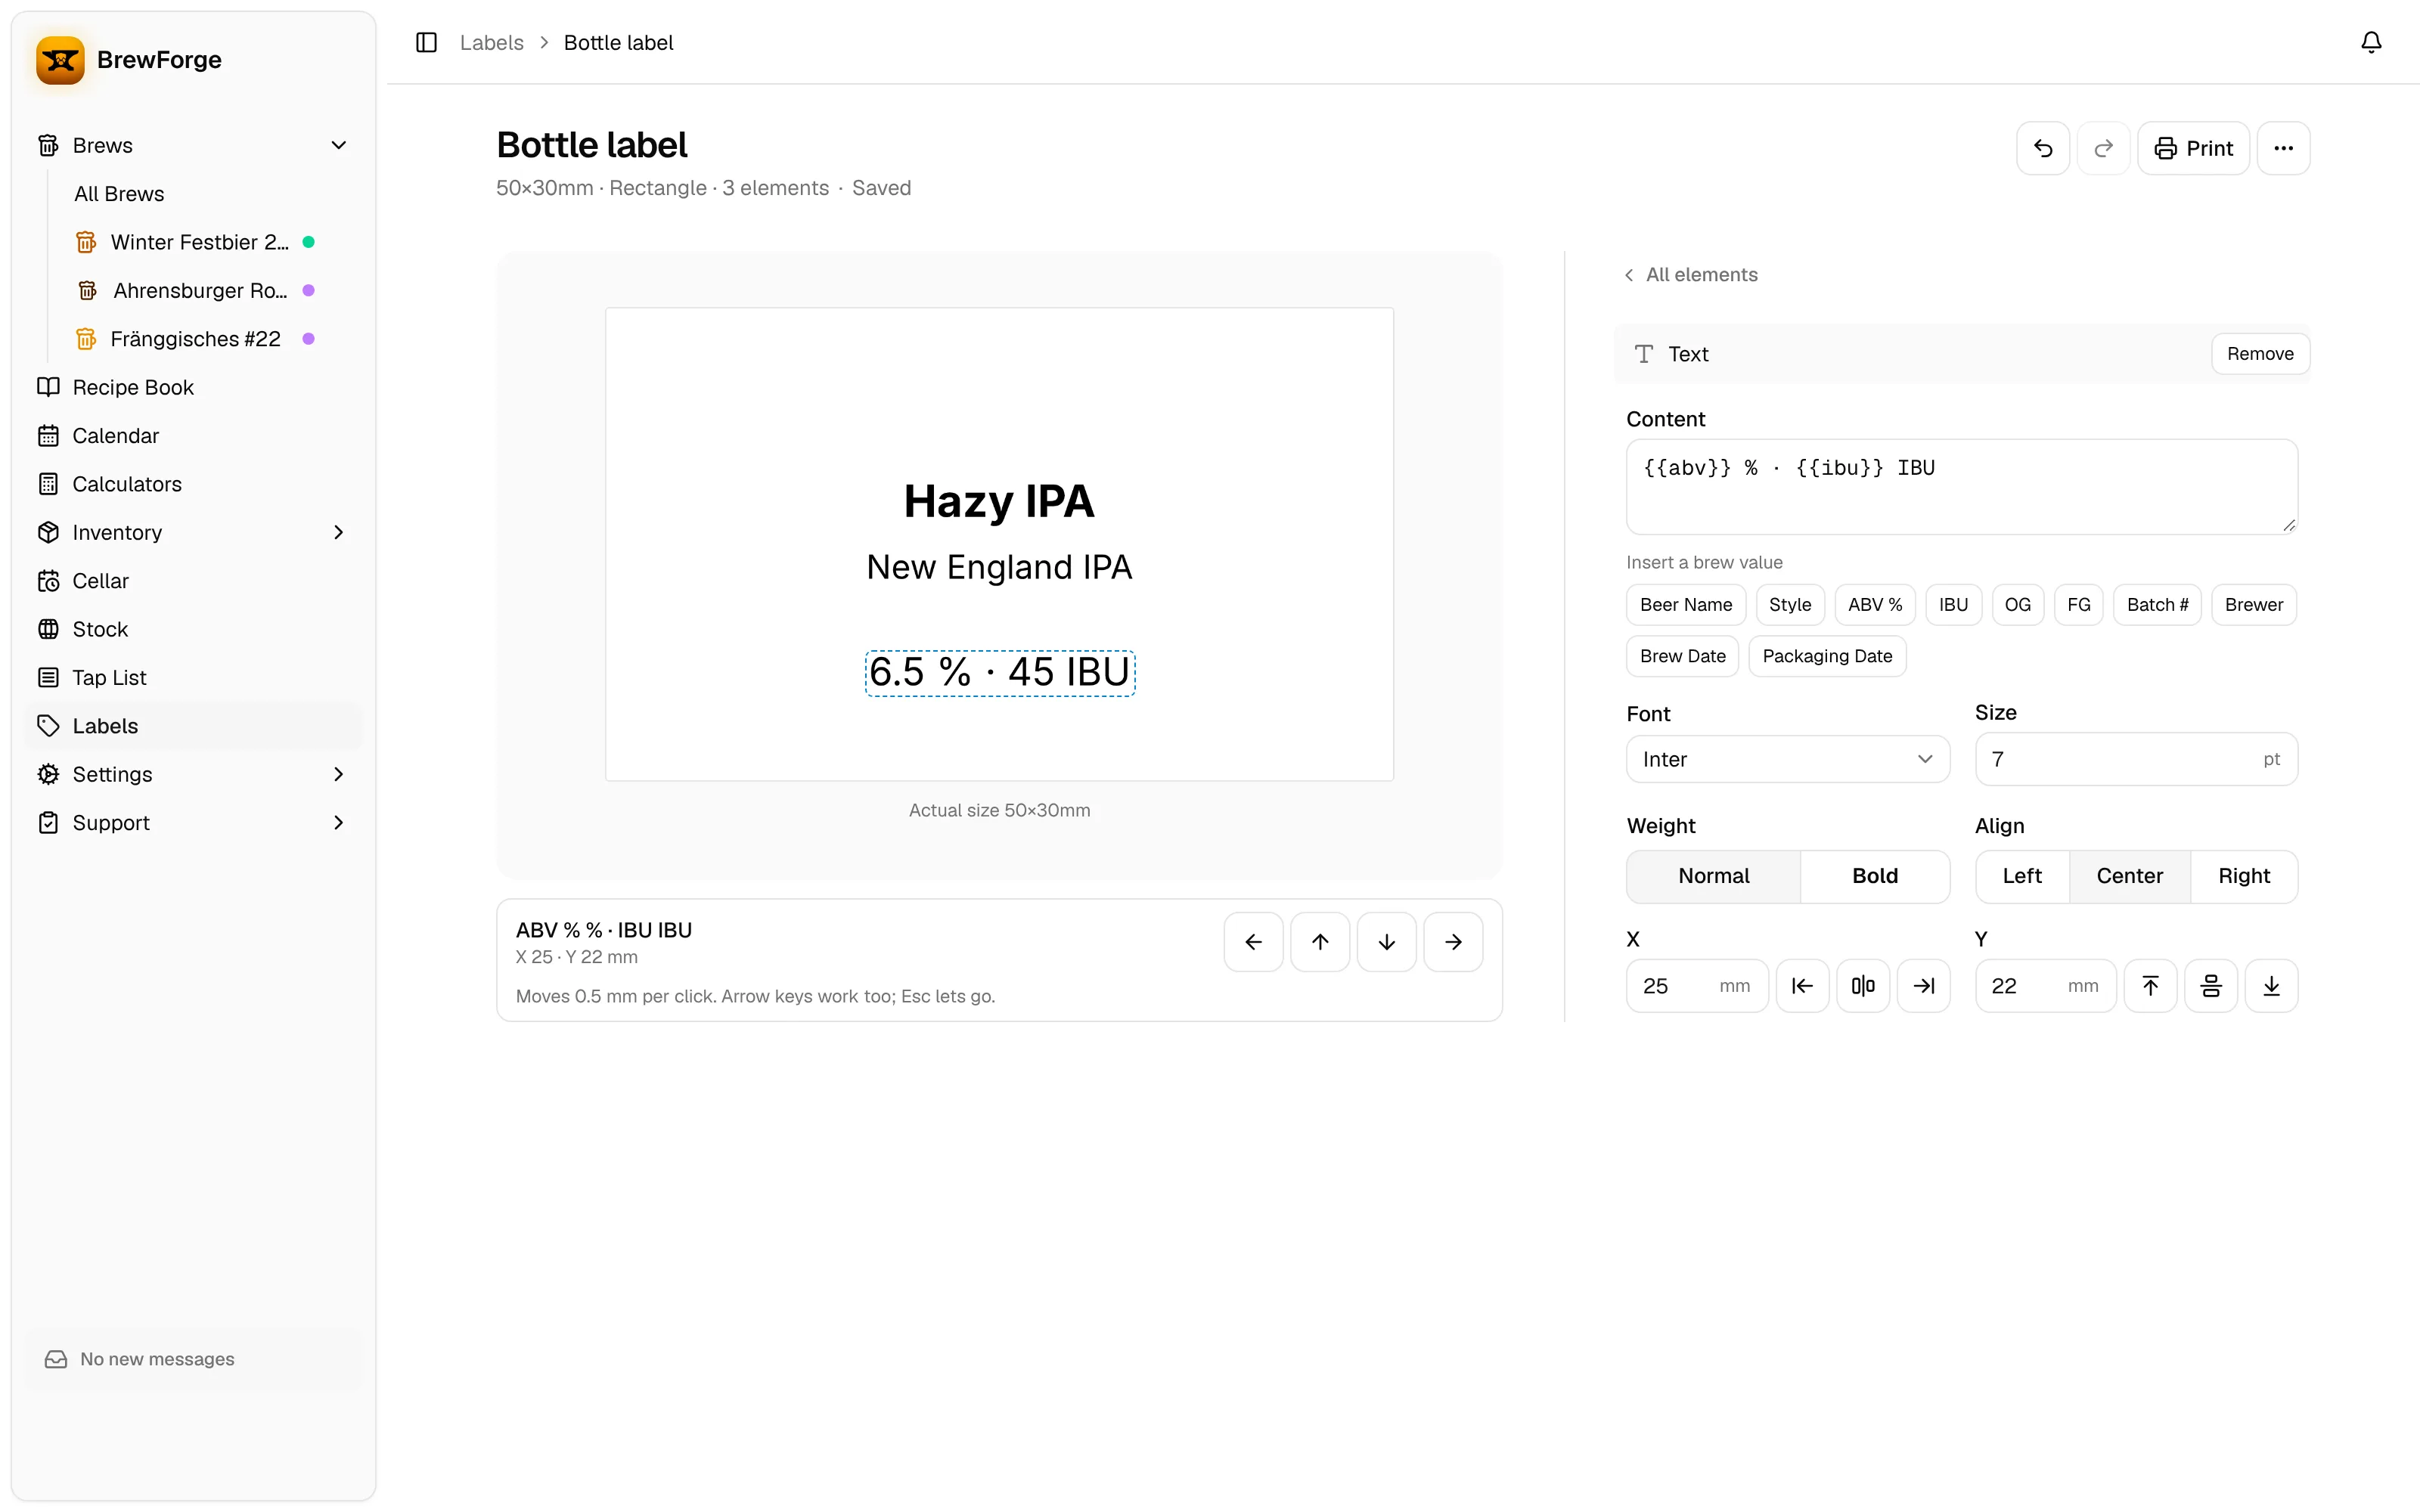
The designer saves every change by itself; the line under the title shows Saving…, then Saved. Undo and Redo next to the title step back and forward through your changes. If a change can't be saved, the line says so and offers Retry; leaving the page then asks first.
The ⋯ menu has Rename…, Duplicate (a copy named "… (copy)") and Delete template. After deleting, Undo in the message at the bottom brings the template back. Print takes you to the Labels page with this template chosen.
Label size
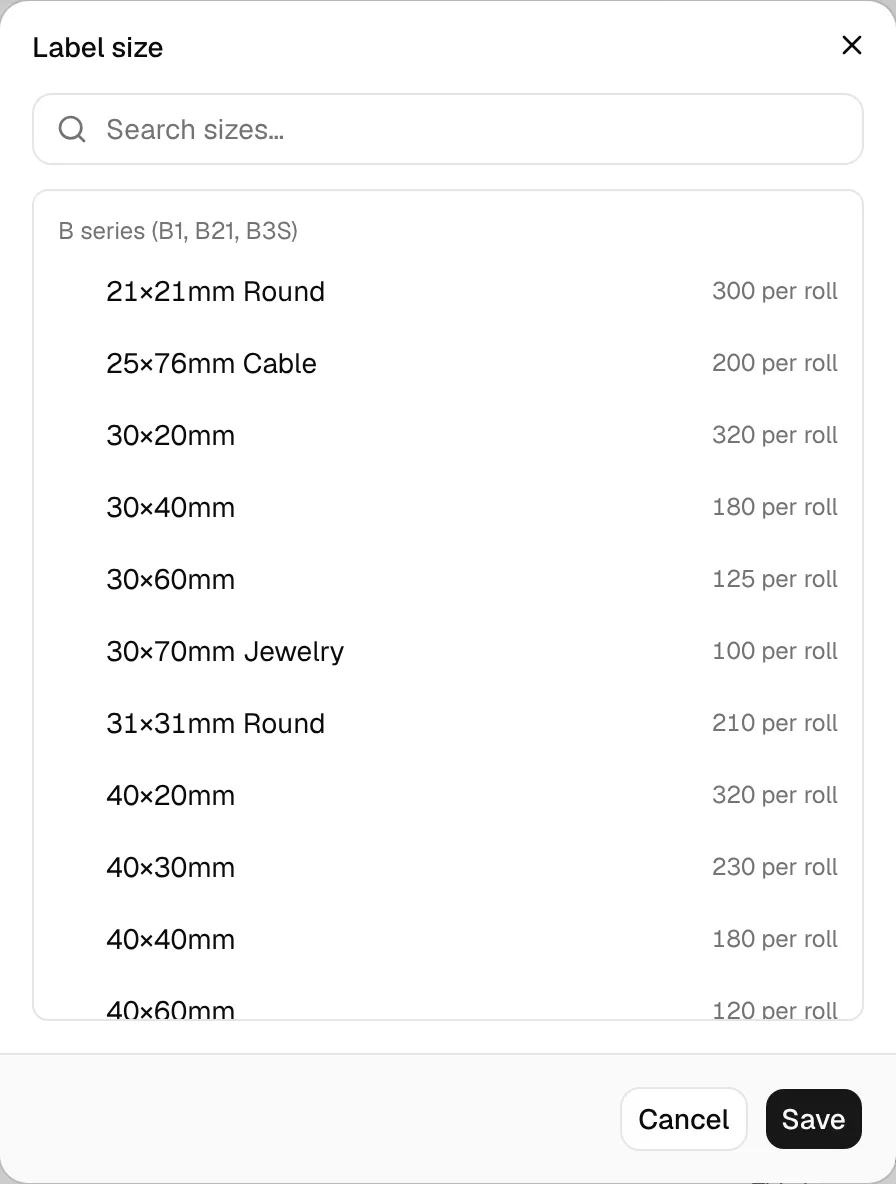
Click the Size row under Label. The list holds the Niimbot rolls of the B series (B1, B21, B3S) and the D series (D11, D101, D110) with the number of labels per roll; type to search. Choose Custom size for any other roll and enter Width and Height (5 to 100 mm, in 0.5 mm steps) and the Shape (Round or Rectangle). Elements keep their position when the size changes, so check the preview afterwards.
Text elements
Click + Text to add a text, or click a text on the preview or in the Elements list to select it. Its settings appear next to the preview; All elements goes back to the list.
- Content: the text. The buttons under Insert a brew value add a placeholder at the end. You can mix placeholders and your own words, for example
Batch #{{batch}}or{{abv}} % · {{ibu}} IBU. - Font: Inter, DM Sans, Source Serif 4, Playfair Display, JetBrains Mono or Caveat.
- Size (pt), Weight (Normal or Bold) and Align (Left, Center, Right). Changing the alignment moves the text to the matching edge or the centre.
- X and Y (mm): the position on the label, measured from the top left corner. X is the point the text is aligned to: with center alignment the text is centered on X. The buttons next to the fields snap the text to the left edge, the center or the right edge, and to the top, the middle or the bottom.
Remove in the element's bar deletes it (Undo brings it back).
Placeholders
| Button | Placeholder | Filled with |
|---|---|---|
| Beer Name | {{name}} | The brew name, or the Name on label you type when printing |
| Style | {{style}} | The brew's style |
| ABV % | {{abv}} | ABV with one decimal, without the % sign |
| IBU | {{ibu}} | IBU, rounded to a whole number |
| OG | {{og}} | Original gravity in your gravity unit (for example 12.4°P) |
| FG | {{fg}} | Final gravity in your gravity unit |
| Batch # | {{batch}} | The brew's batch number |
| Brewer | {{brewer}} | The brewer name of the brew |
| Brew Date | {{brew_date}} | Brew date |
| Packaging Date | {{packaging_date}} | Packaging date |
ABV, IBU and gravities are the same values the brew shows: measured values where you entered them, otherwise the recipe's. Dates and decimals follow your app language. A placeholder whose value the brew doesn't have (no packaging date yet, for example) prints empty.
Preview with under the preview chooses what the preview shows: Sample values, which you can edit, or A brew of yours. This only changes the preview; printing uses the brew you choose on the Labels page.
Brewery logo
Click + Logo to add the brewery logo from Settings → General → Brewery (upload it there first; without one, a note links to Settings). A label can have one logo. Set its Width, Height, X and Y in mm, or use the snap buttons. Label printers print in black only, so a logo with clear contrast works best.
Move elements precisely
With an element selected, the arrow buttons under the preview move it by 0.5 mm per click. The arrow keys do the same, and Esc lets go of the element.
BrewForge draws the label at the printer's resolution:
dots = round(mm ÷ 25.4 × DPI) for sizes and positions, and pixels = points ÷ 72 × DPI for font sizes.
Example: a 50 mm wide label on a 203 DPI printer is round(50 ÷ 25.4 × 203) = 400 dots wide; 8 pt text is 8 ÷ 72 × 203 = 22.6 dots tall.
The DPI comes from the connected printer; if it doesn't report one, BrewForge uses 203. The background is always white. Source: apps/web/lib/labels/render.ts, apps/web/lib/niimbot.ts.